Calgary Insights
Inspect Hail Damage Like a Pro: Complete Guide & Photos
By CPR Group Ltd Published Updated
Hail damage inspections are still ongoing in Calgary after the devastating 5th August hailstorm. Homeowners are left with reports and scope of work by their insurance providers with little information on what a hail damage report to their properties should or shouldn’t include.
Let’s see the process, tools and what needs to be inspected after a property undergoes a hailstorm event.
Tools & equipment required to inspect hail damage to properties
Newer software apps & phones with high resolution cameras have simplified the inspection process and made it easier for inspectors to document hail damage.
Must have tech stack for damage documentation:
CompanyCam – great for address based project creation, for taking & editing photos with more context around the damage that someone is seeing, and writing hail damage reports.
Hover – it’s great for building a 3d map to use for measurements of exterior and roof. Indispensable tool that saves time and effort. Imagine doing all the measurements manually when you have over 20 thousand damaged properties.
Eagleview – also great for satellite measurements but pricier than Hover.
Xactimate – this is a proprietary software launched and maintained by Verisk. It’s the standard when it comes to writing estimates for property claims. It will contain a lot of line items but it’s rather easy to understand what’s being replaced or repaired at your hail damaged property. It comes with a pre-defined price list that’s updated on almost a monthly basis by insurance companies.
Drones – super useful for steep roofs, which are more difficult to step on.
Other equipment to have on a hail damage inspection:
Chalk – used to note damage. It’s the perfect product as it will wash away with the first rain.
Ladders – CSA approved/certified ladders with 3-point contact while climbing amongst other.
Checklist – widely available pre-made checklists by insurance, restoration, roofing and exterior companies. Note taking is vital for hail damage inspections and will help reporting writing a breeze (together with photos). Throw some brand in a form of a logo at the top of the checklist to get that exposure.
The step-by-step hail damage inspection
Inspecting sloped shingled roofs
Start by taking a 360 degree photos of the roof. Locate main roof facets and initiate hail hit count. Most insurances will acknowledge shingle roof damage by hail, when done in accordance with HAAG standards. That implies chalking a 10x10ft square, and circling around minimum 10 hits. Something inline with the photo below:
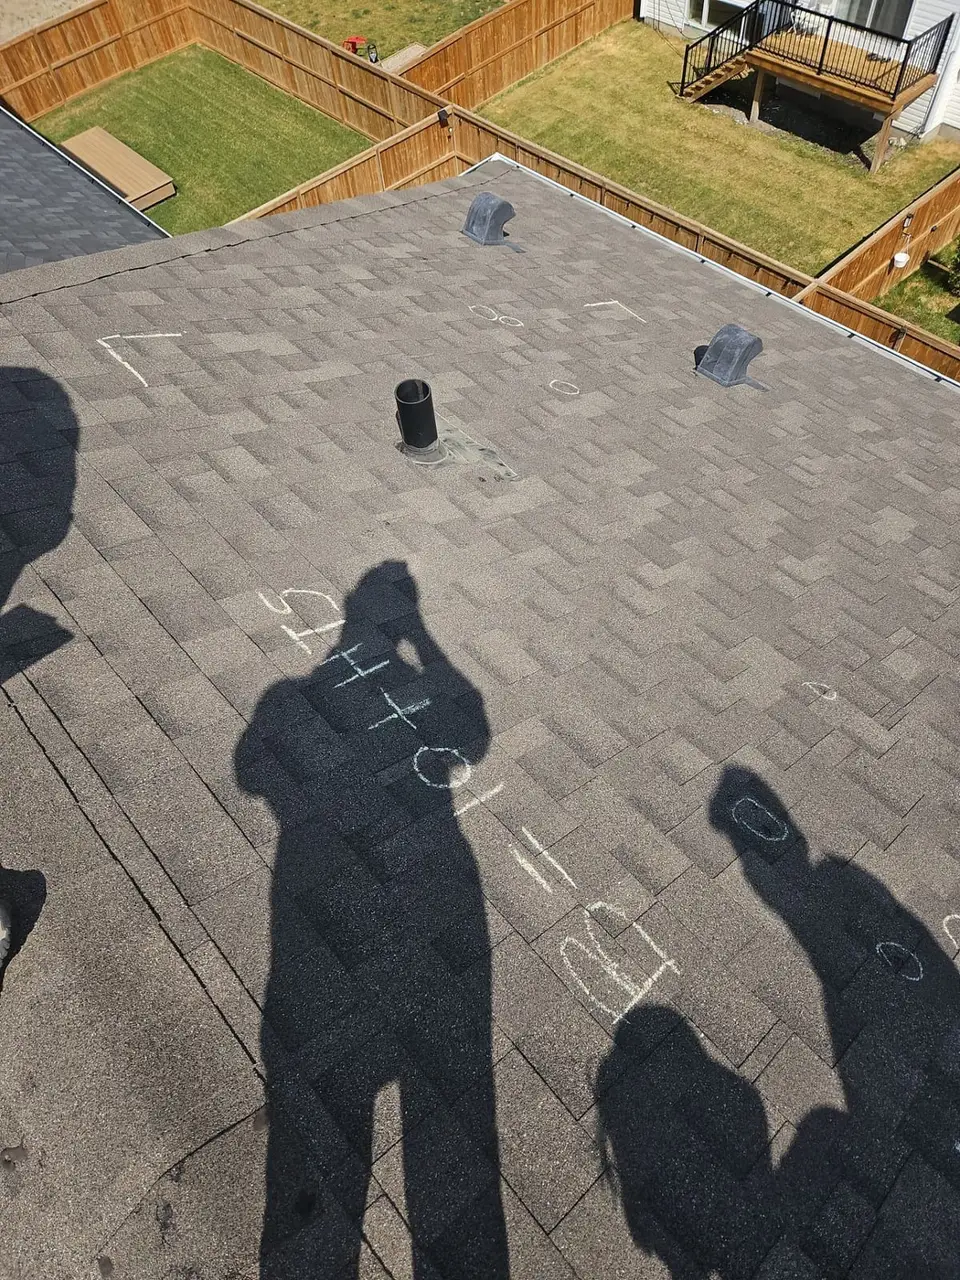
That would be enough of a square to recommend a roof facet replacement. In most cases and depending on the roof size, if at least three more meaningful sized roof facets are damaged, then a full roof replacement will be recommended in Xactimate.
If the roof is reaching it’s lifespan and de-granulation is troubling to determine hail loss, you can:
- Check surrounding roofs for hail hits.
- Check whether this neighbourhood was hit by the storm.
- Try finding a metal valley close to you. The dents will be obvious and help you conclude that hail did in fact hit this house.
Now let’s see a close up of a hail hit on a shingled roof, and damage to roof accessories.
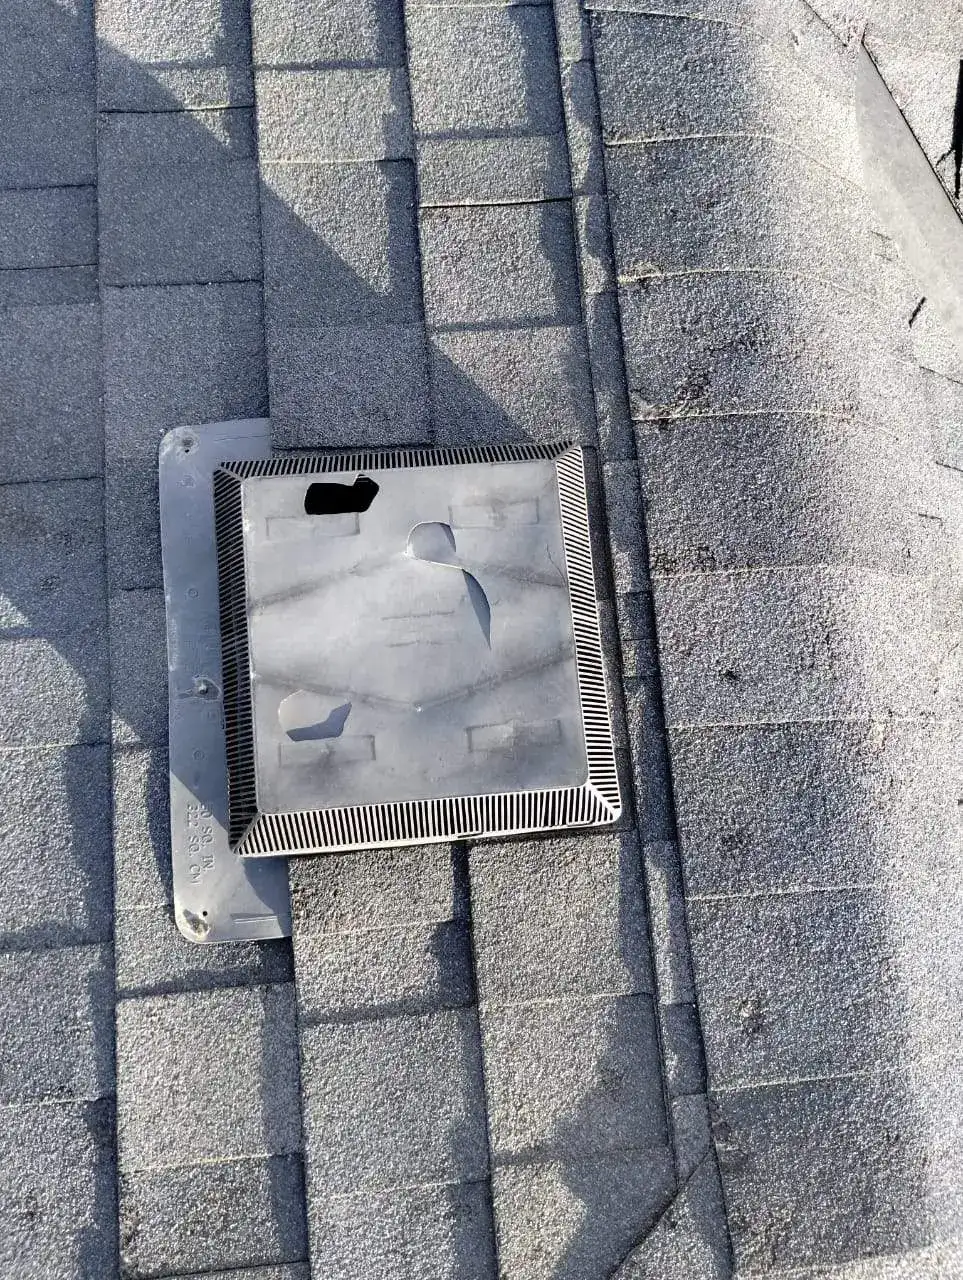
Multiple hail hits to turtle roof vent
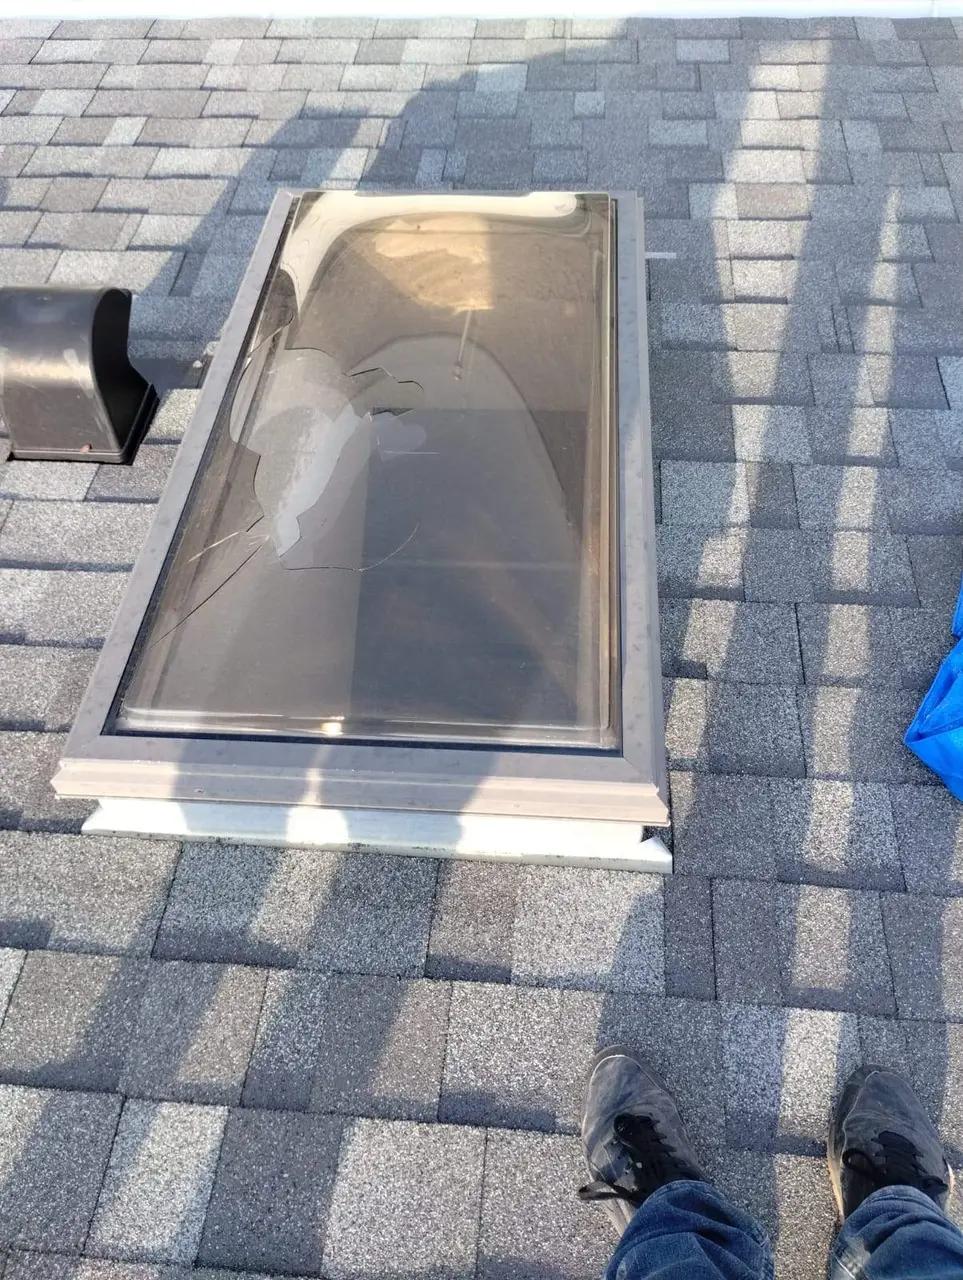
Broken glazing from hail hits to roof skylight
Hail damage dents to gooseneck and shingles
Inspecting flat roofs for hail damage
You’ll need a more keen approach to find hail hits in torch down SBS flat roofs installations.
Commercial roofing in Calgary and in flat roofing in general, experience more foot traffic as HVAC units in commercial buildings are placed on top of the roof amongst other.
That means HVAC professionals will access the roof to maintain/repair these units whenever needed. Exposure to foot traffic (think of heavy constructions boots) will impact the cap sheet membranes making hail damage inspections more ambiguous. Though different in shape and pattern it’s something every roof inspector in Calgary should be aware off.
The age of a flat roof will be a blocker too, but experience has taught us valuable components that can help you in your inspection.
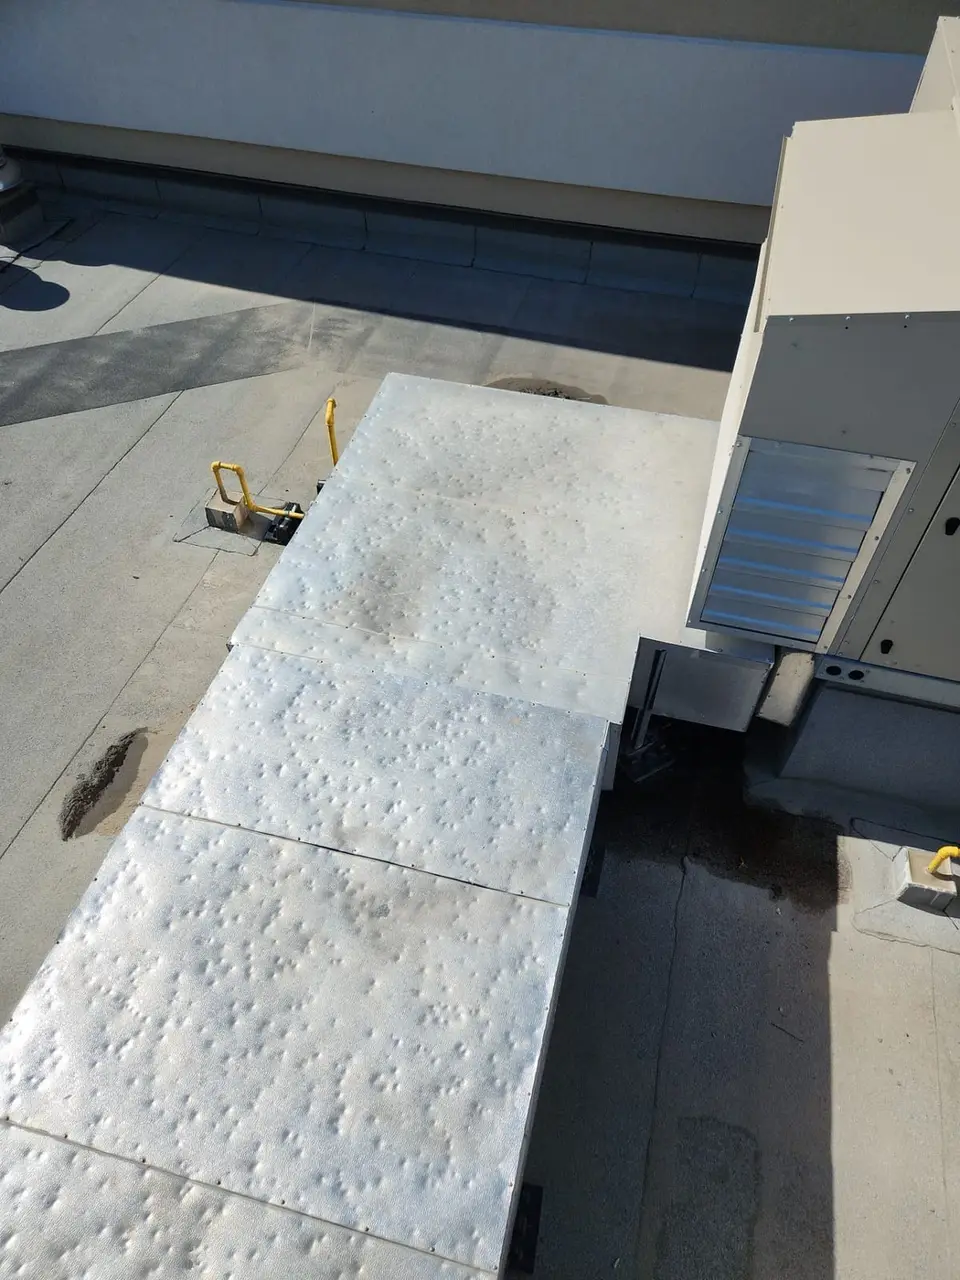
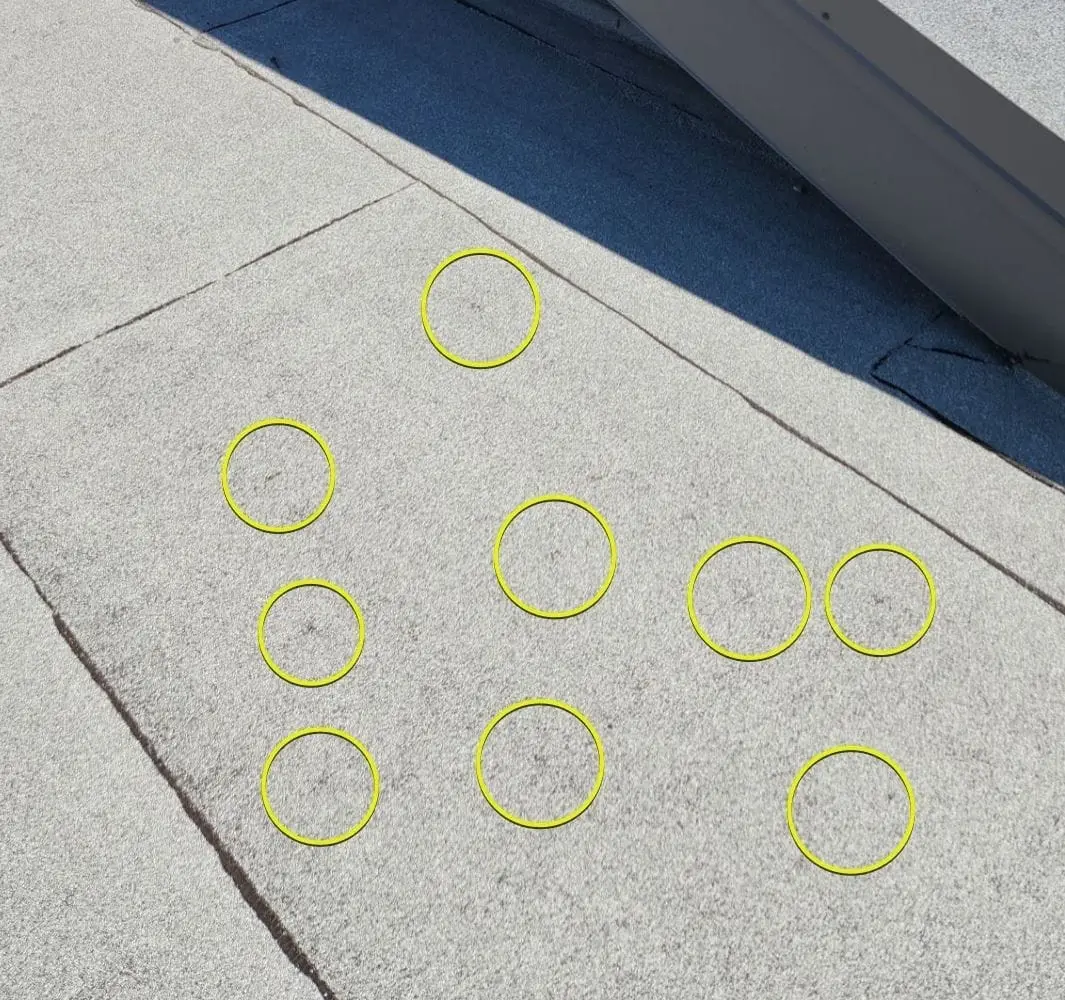
Many hail hits to roof mounted duct
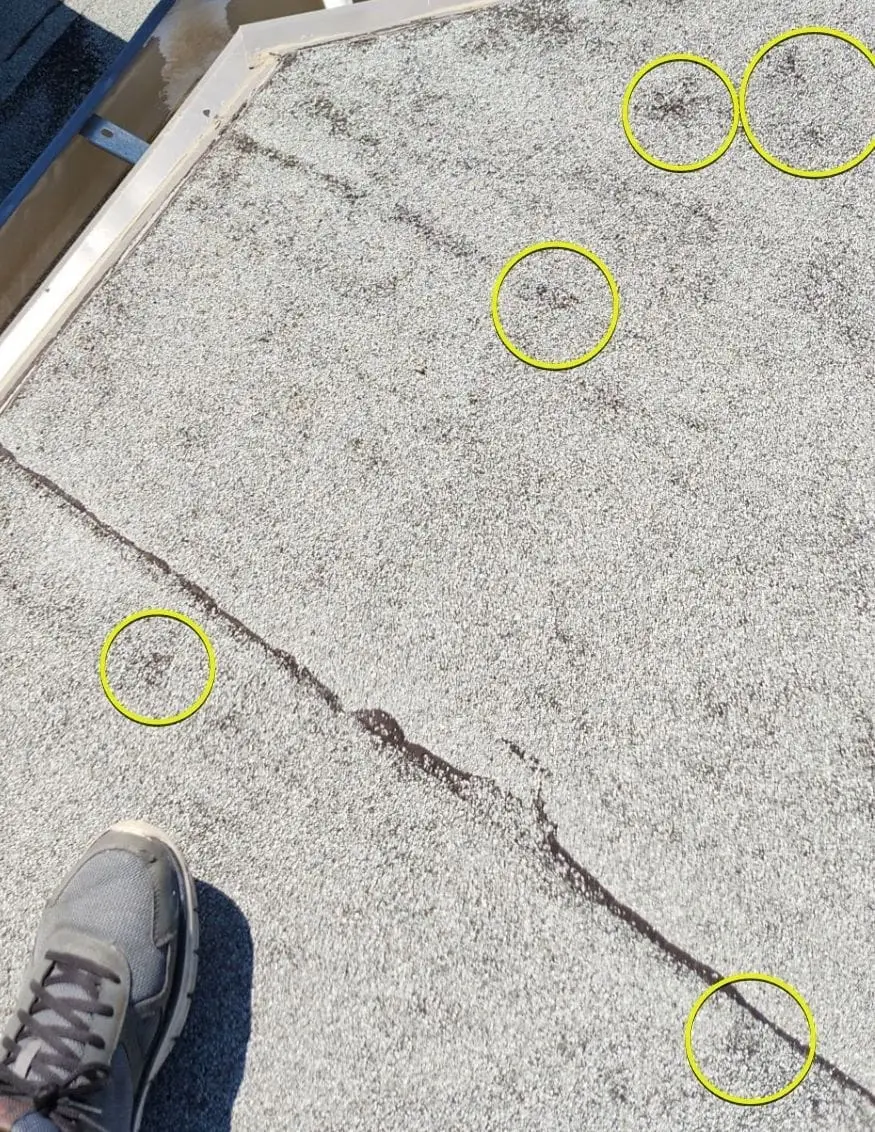
Rough circular shapes of hail hits to torched down roof
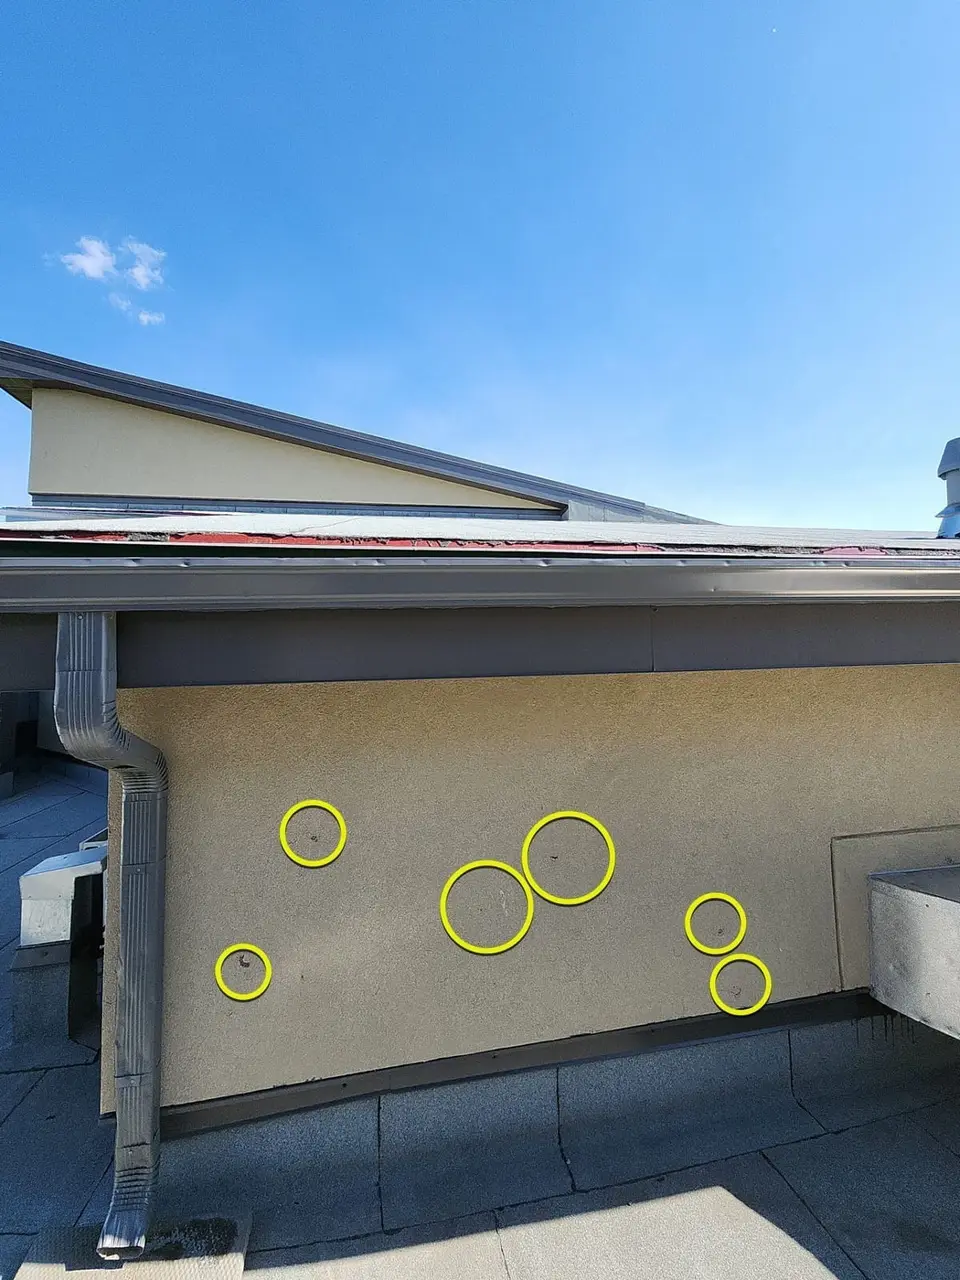
Hail hits to stucco’ed wall located on a flat roof
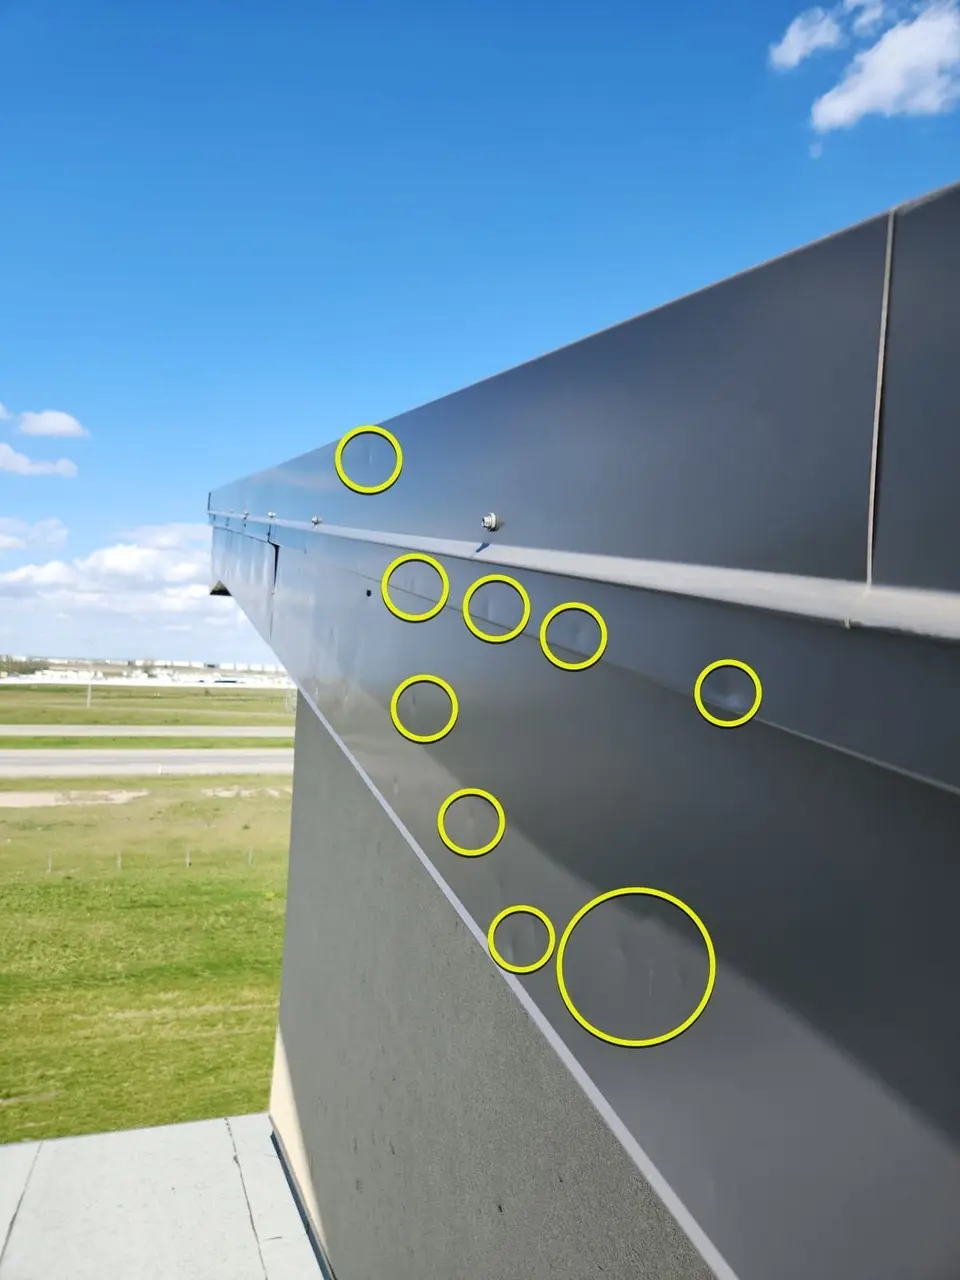
Dents to parapet wall flashing
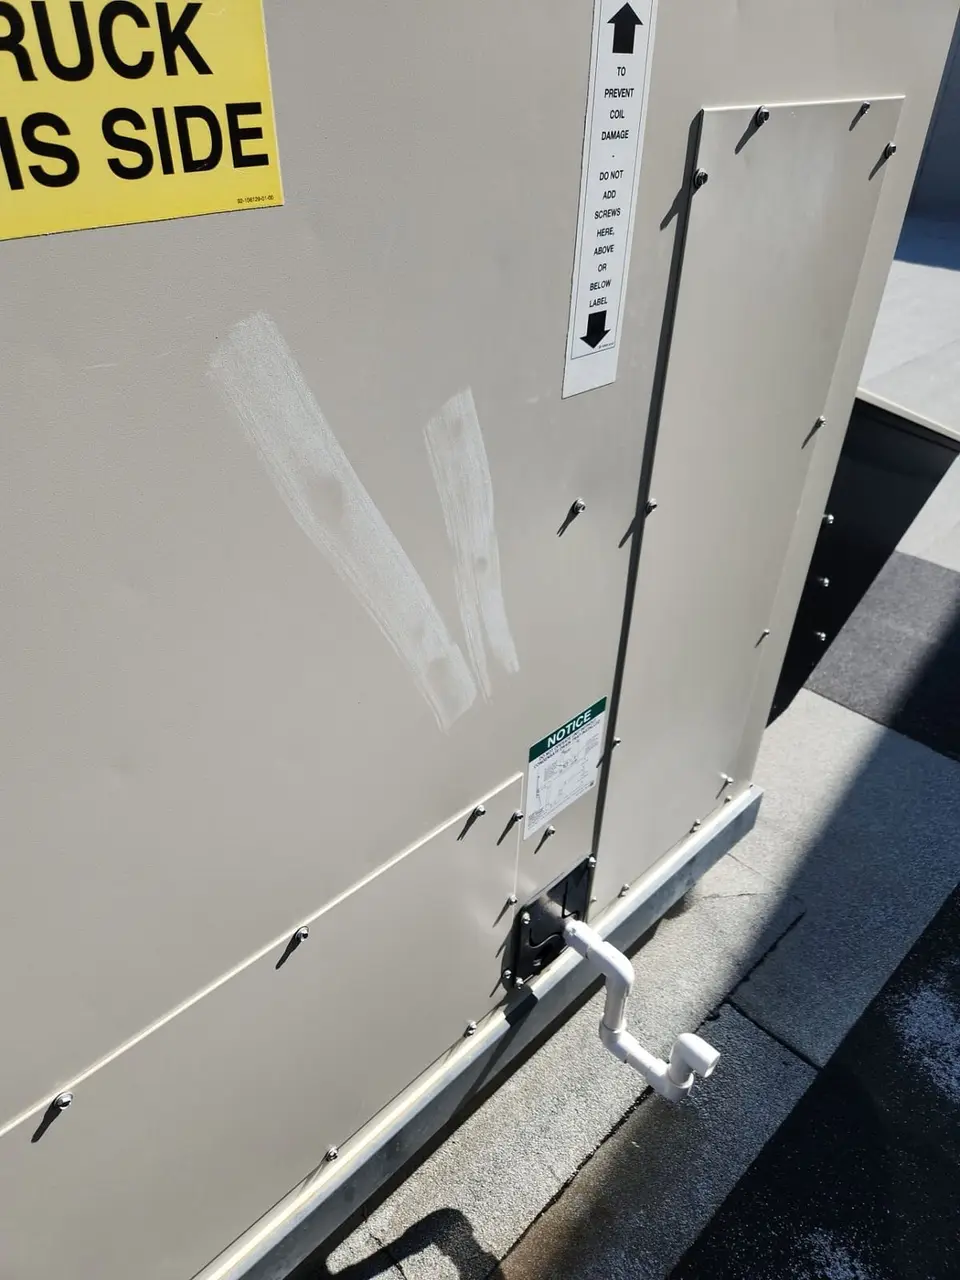
Chalk used to identify hail hits to HVAC units
Consistency to hail damage pattern shown
Circular bruising to flat roof membranes and consistency in impact density are your best friends to identify hail hits. You can further help qualify your report by just looking at the surroundings. We’re talking about flat roof accessories like hail hits to parapet wall flashing, hits to HVAC units, flat roof mounted ducts, or walls with some kind of siding installed to them e.g stucco. They’re your best friends if you’re finding difficult to qualify hail hits to a flat roof membrane.
With flat roofing in Calgary, you can either recommend specific rolls to be removed & replaced, or a full replacement depending on the damage you’re seeing and the impact to roof’s lifespan.
Inspecting metal roofs for hail damage
Hail damage to metal roofs system installations are super obvious, regardless of the property type, commercial or residential. Hail dents to metal roofs will be best noticed on sunny days.
What helps is viewing the roof at a low angle. Place your ladders as per Alberta’s code, and climb to reach roof perimeter. Place your image capturing device and capture potential hail damage.
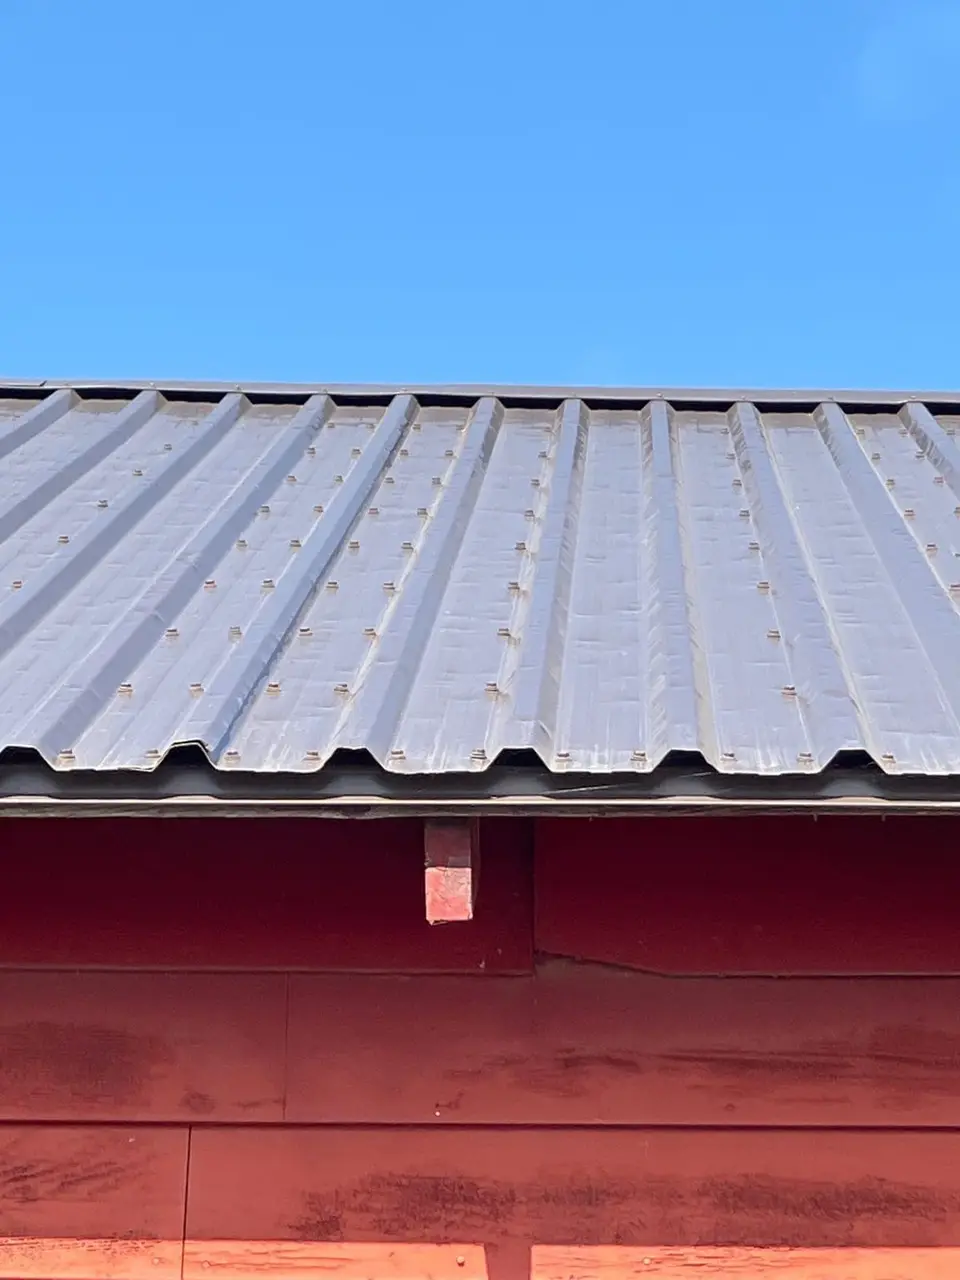
Viewing the roof at a low angle where sunlight creates shadows/reflections across the panels
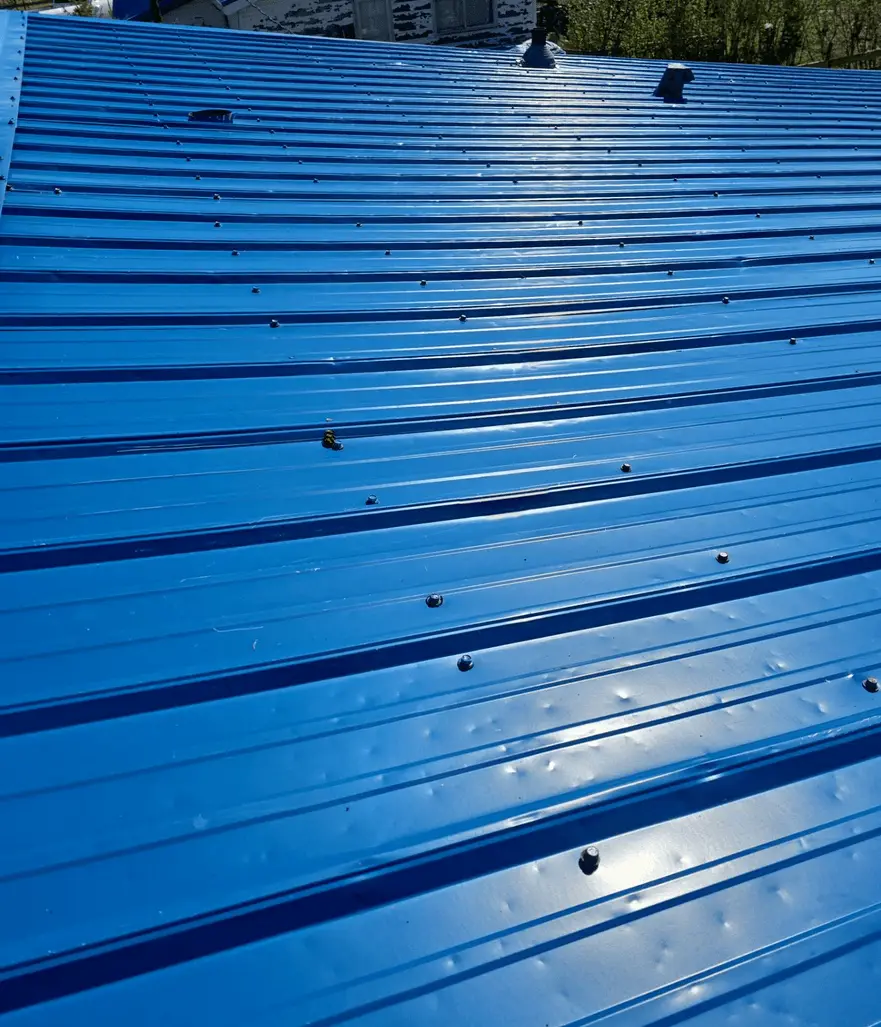
Sunny weather exposing hail dents to blue metal roof much effectively
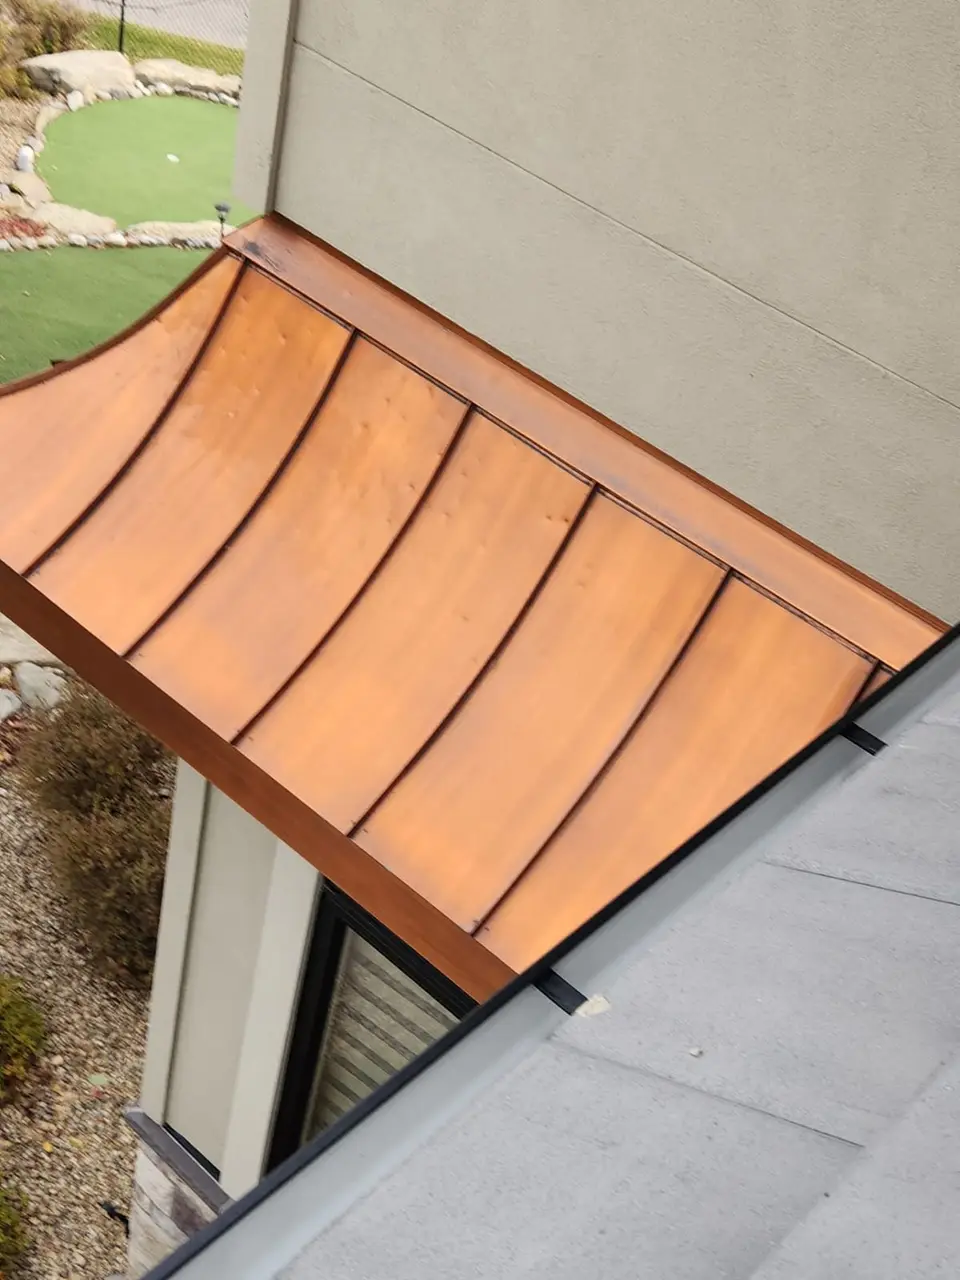
Hail dents to residential metal copper roof
Overcast conditions are a blocker if you’re viewing the roof from far up e.g. you’re standing on a close by building and trying to determine from distance is a no-go. Make sure you schedule your metal roof inspections during sunny days and save yourself a trip (& gas).
Inspecting vinyl siding for hail damage
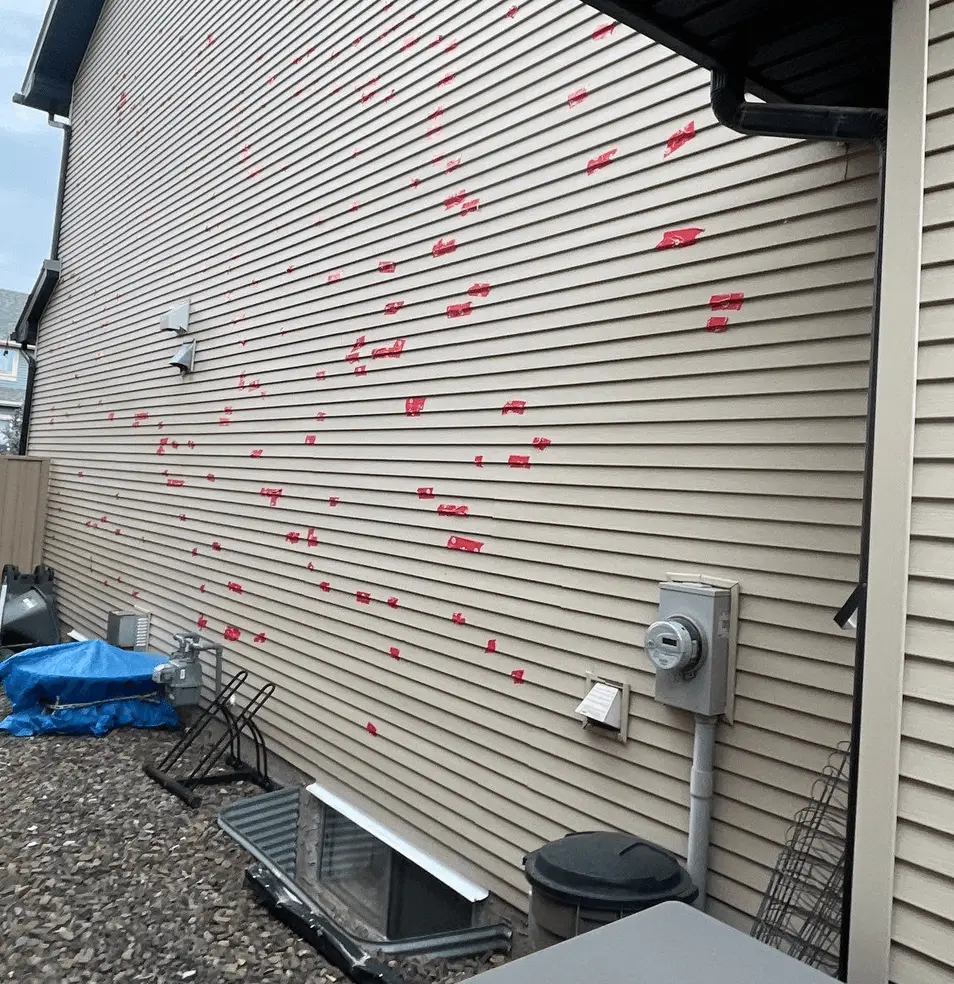
This would be the easiest part of hail inspection. Vinyl siding exterior installations will have the most obvious damage in the forms of cracks to vinyl siding.
Hail storms during cold months will cause more damage as vinyl is more brittle in minus temperatures.
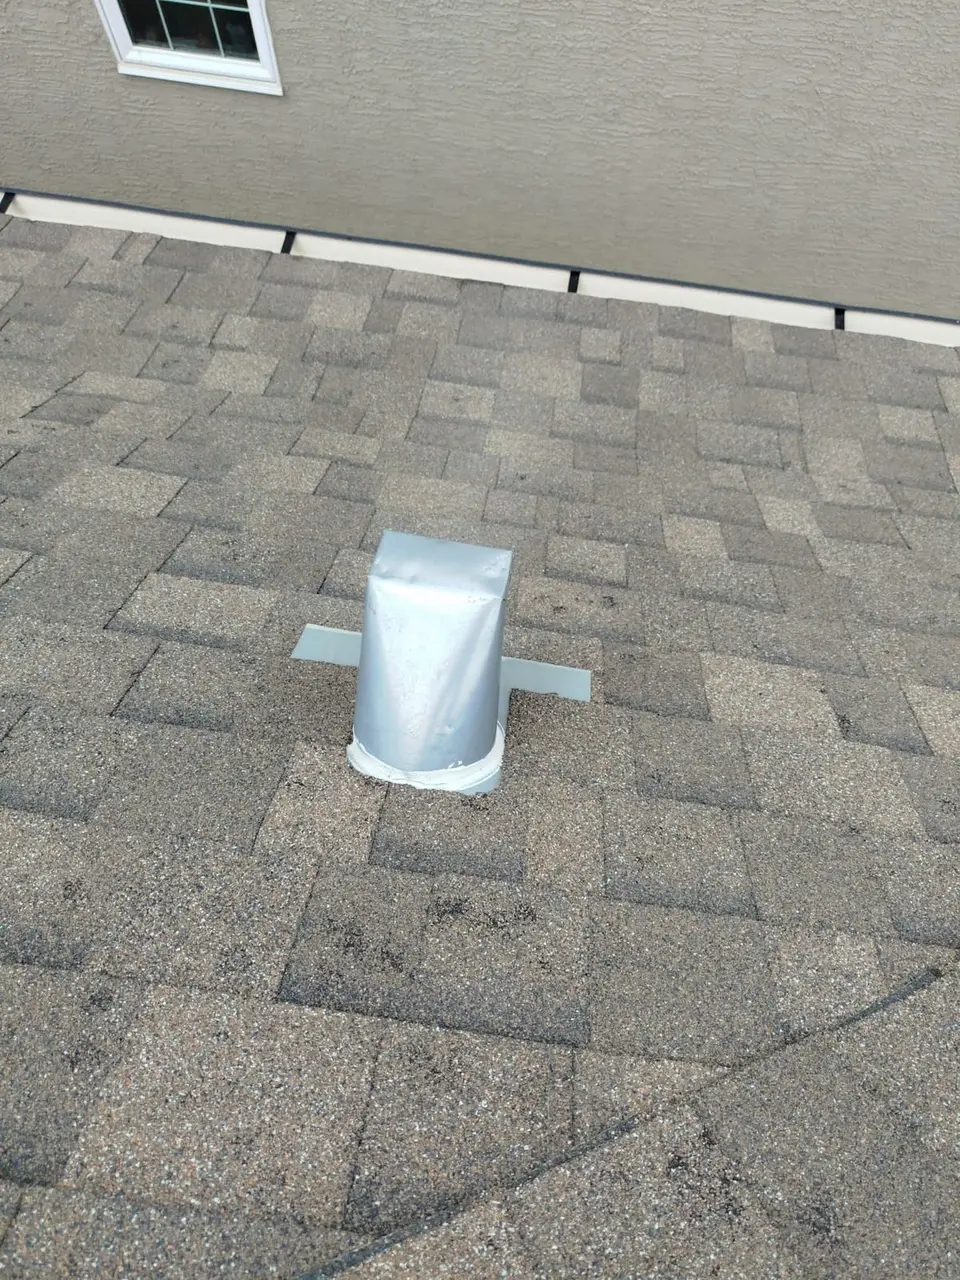
A few good intent homeowners will try to tape over cracks as temporary measures but it’s not an effective temporary repair solution. The tape won’t prevent the water intrusion behind siding. It can further trap moisture and debris behind siding.
Vapour barrier is the moisture protecting layer of your house and not vinyl siding. You should let the insured know that in any case, moisture will get behind vinyl siding hence the weep creeds under the panels to drain water out. It’s important to have this layer intact.
Position yourself close to the wall and look upward to find less obvious hail hits
Taping holes from hail isn’t efficient
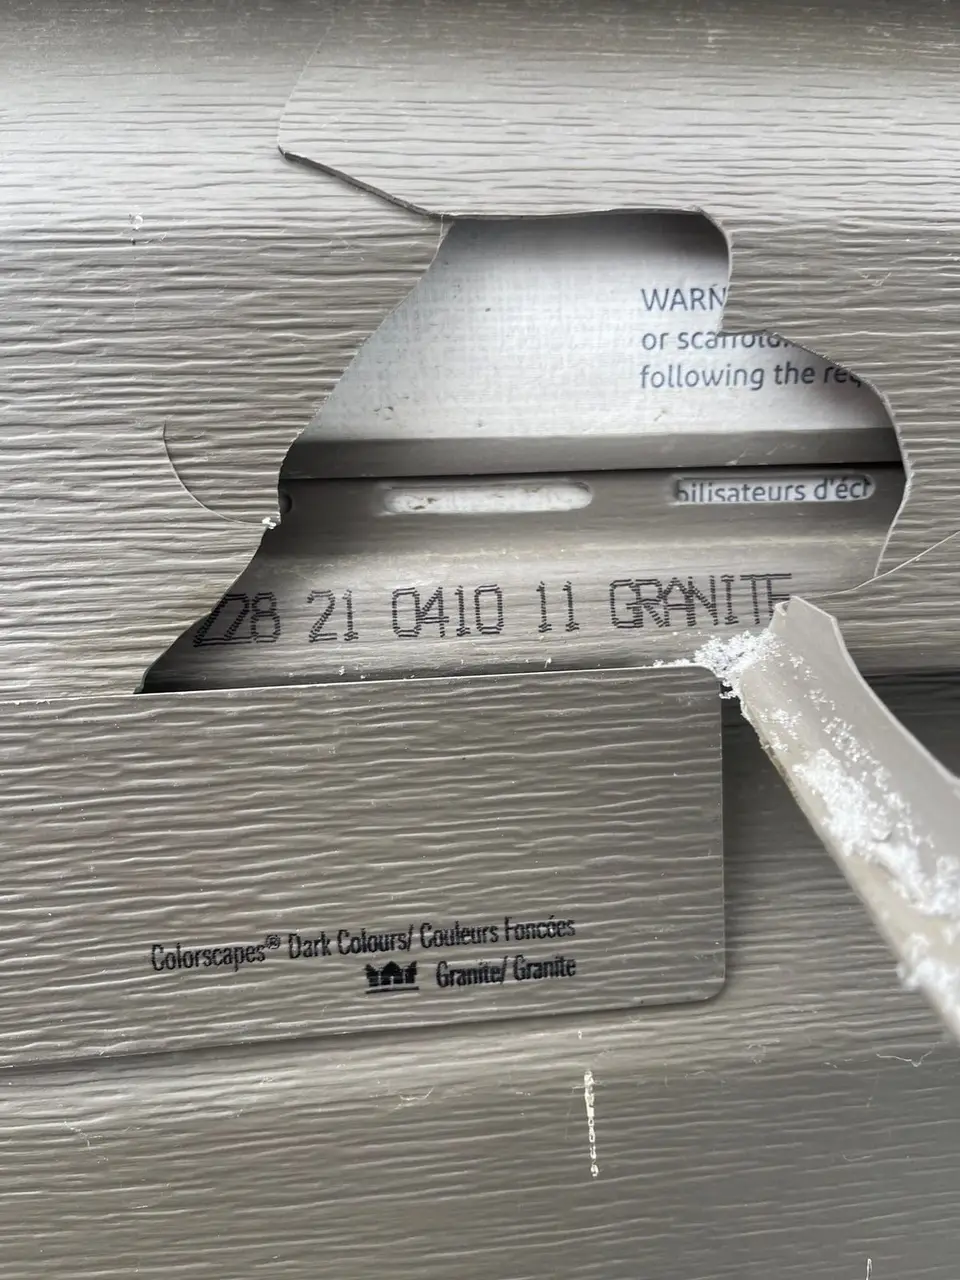
Matching vinyl siding
Finding less obvious hail hits to vinyl siding can be done by positioning close to the wall and looking upward (see image above). Bringing match-able vinyl samples will always save you a trip back to the property once work approval arrives from the insurance carrier.
Inspecting wooden siding
A great siding to have as protection from hail storms. It barely endures any structural damage from hail impacts.
Though not uncommon, keep in mind that wooden siding might exhibit marring to paint after a heavy hail storm. Same goes for wooden fences.
Wooden siding installations are rarely installed now. Calgarians opt for Hardie board siding because of the appeal, fire, and harsh weather resistance.
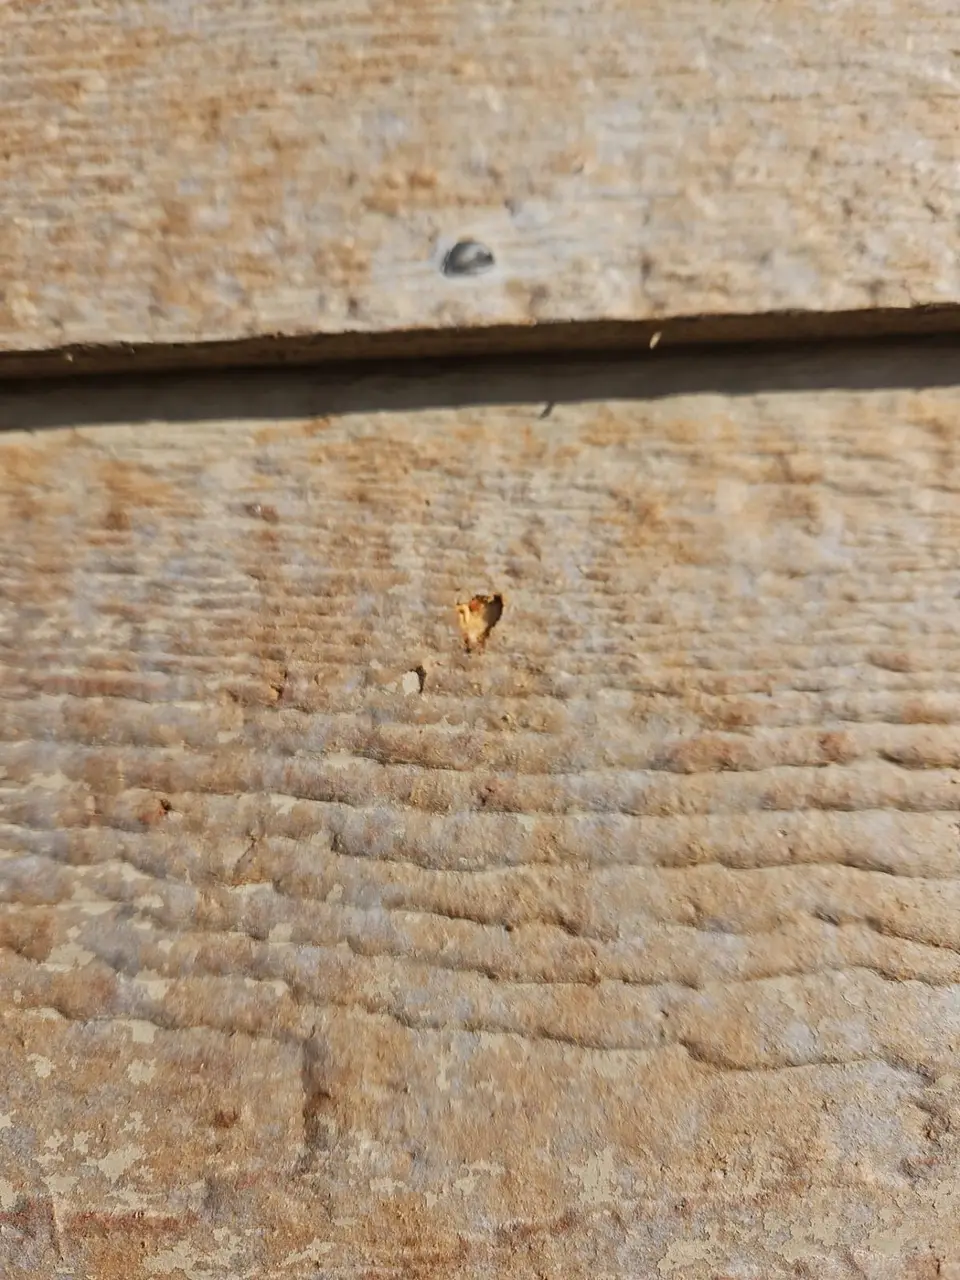
Minor splintering to wooden siding by hail
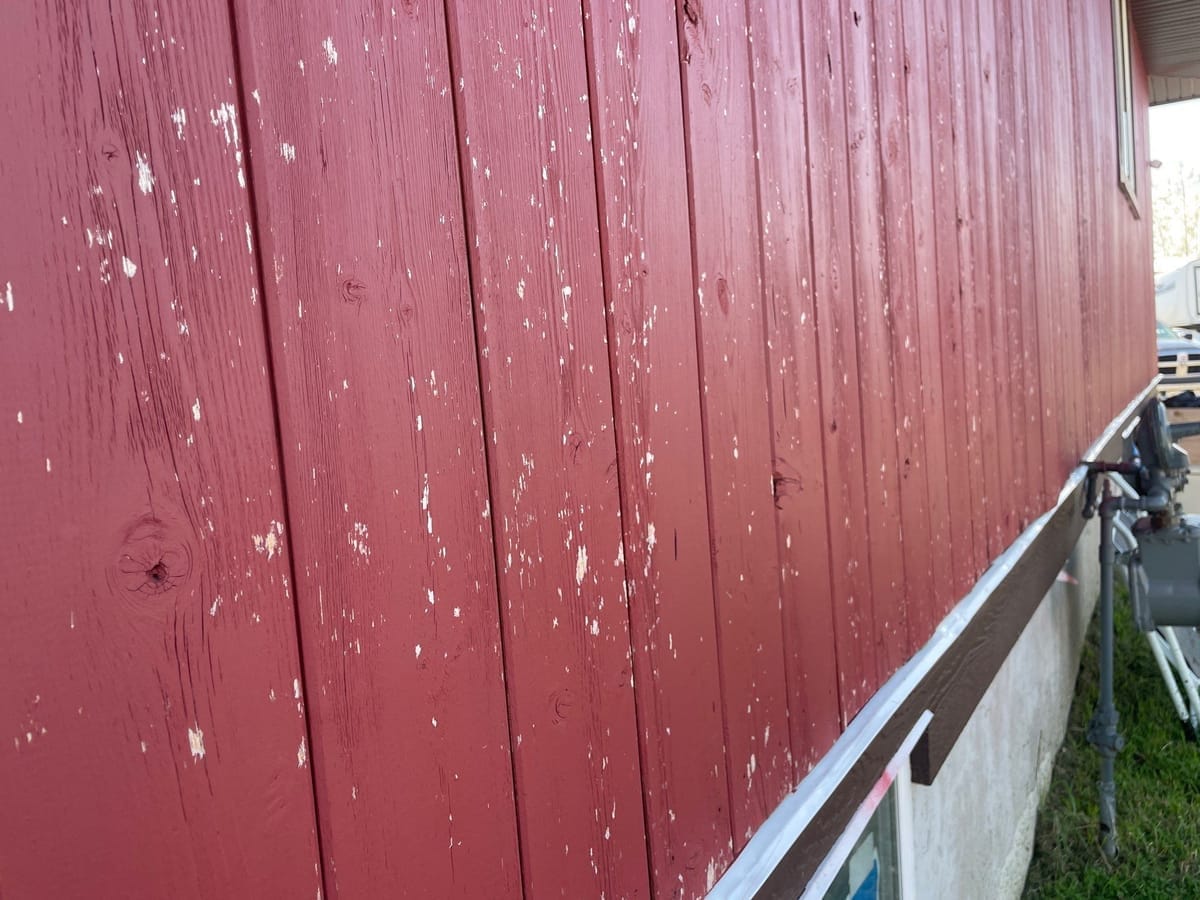
Paint damage to wooden siding by hail hits
In most cases a recommendation to re-paint wooden siding with two coats will be enough to restore the siding to it’s pre-damage state.
A bonus point here is that
Inspecting metal siding for hail damage
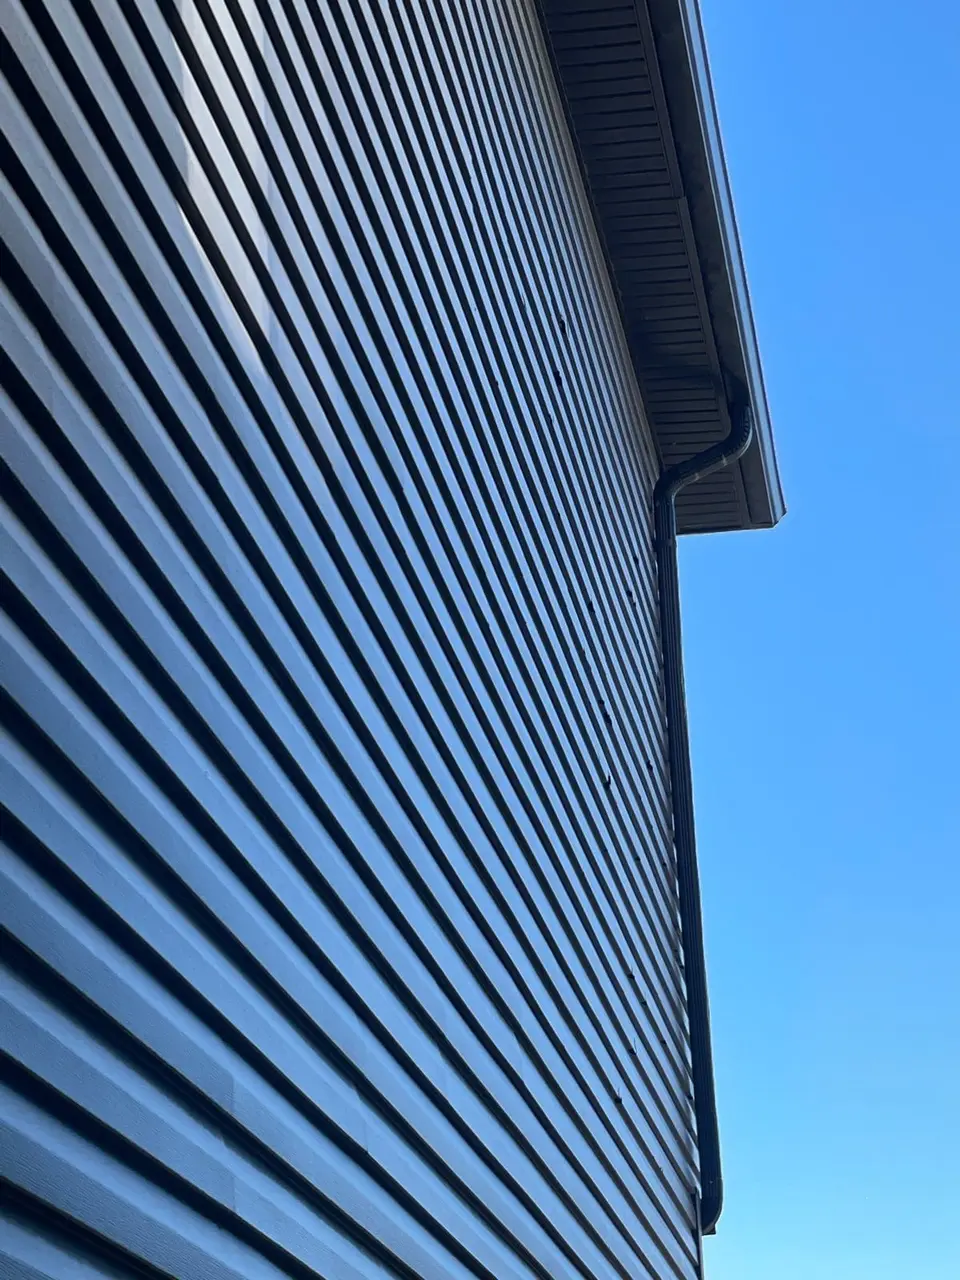
Similar to metal roofs, on sunny days hail damage to metal siding is super obvious. Look for sharp circular dents.
Metal siding cannot be repaired, so a new metal siding replacement should be recommended. See image below:
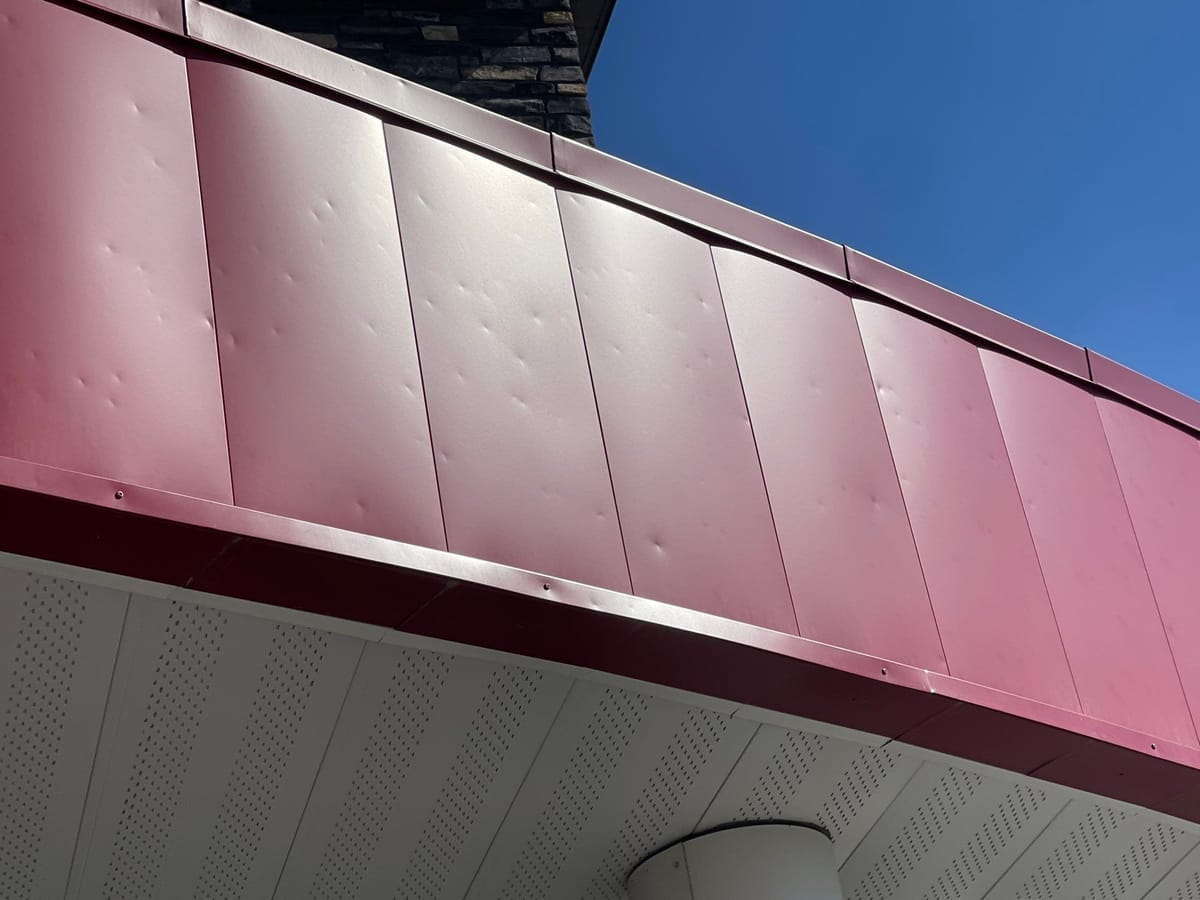
Sharp with defined edges – hail hits to metal siding
Inspecting hail damage to soft metals
Aluminum fascia, gutters and downspouts do the ‘leg work’ as early indicator of hail damage.
They come in spoon-shaped or sharp creased dents. It can help records the exact hail size through dent diameter (if that matters for you at that moment).
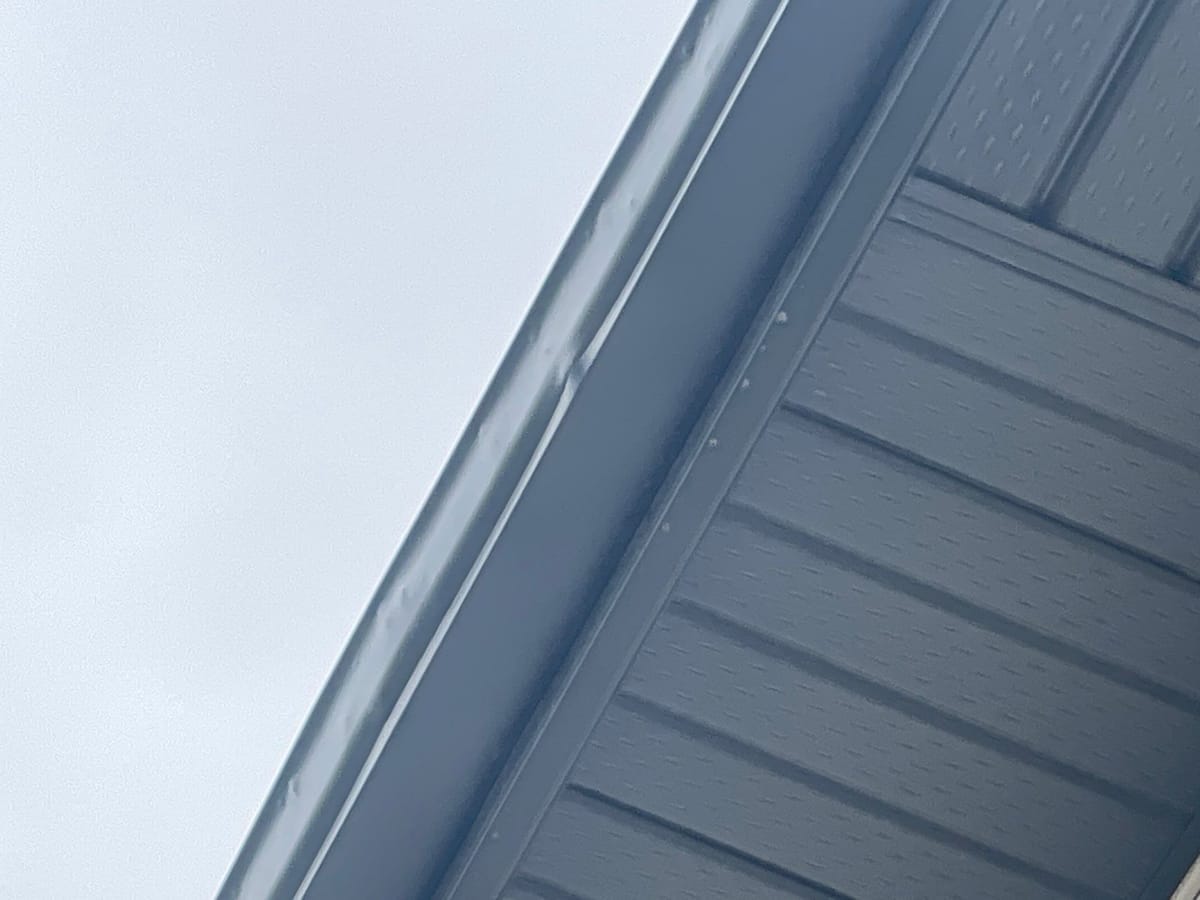
Dents to white eaves from hail
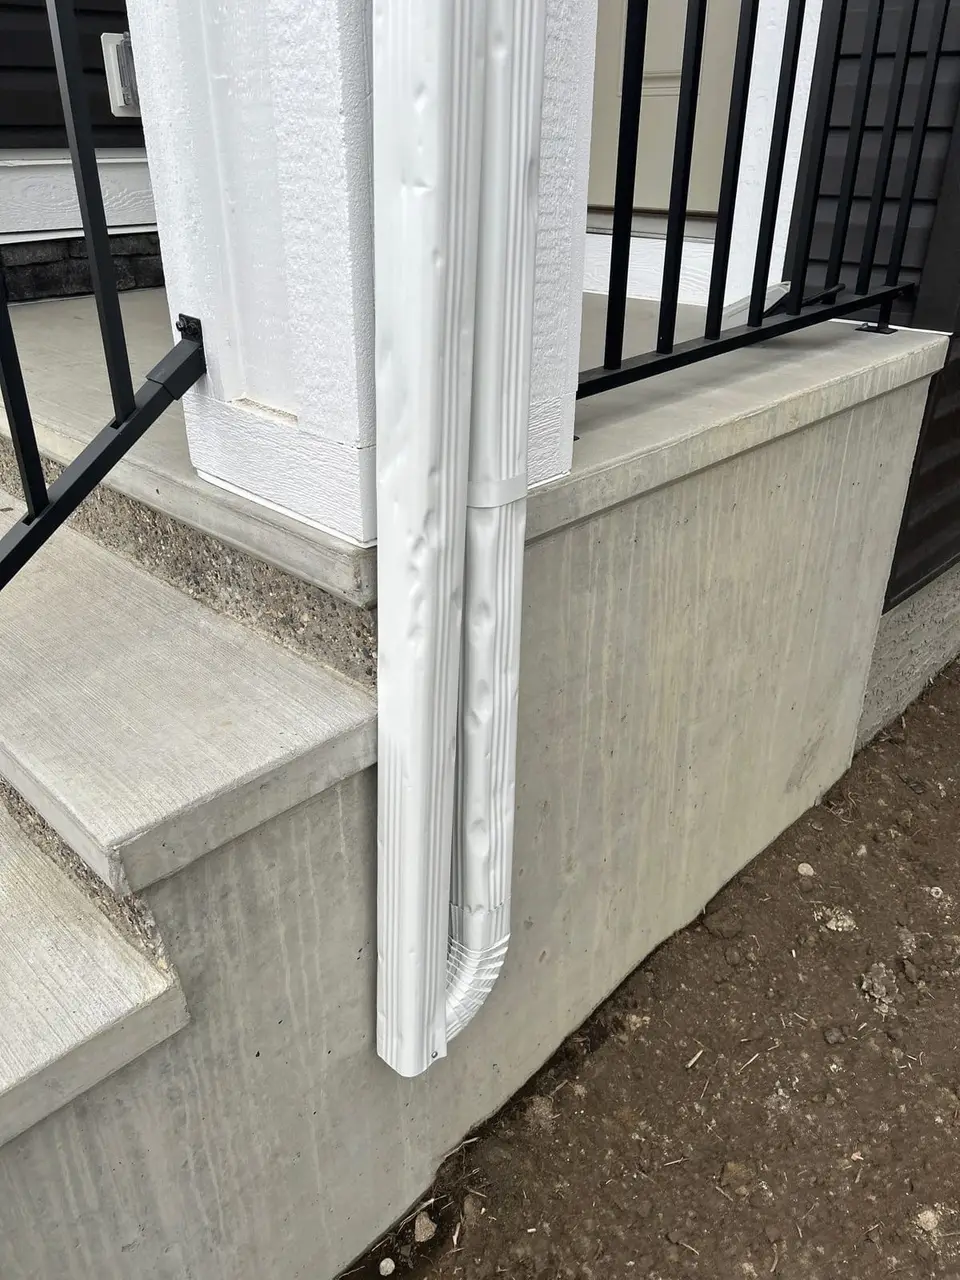
Spoon-shaped hail dents to white downpipe with extension
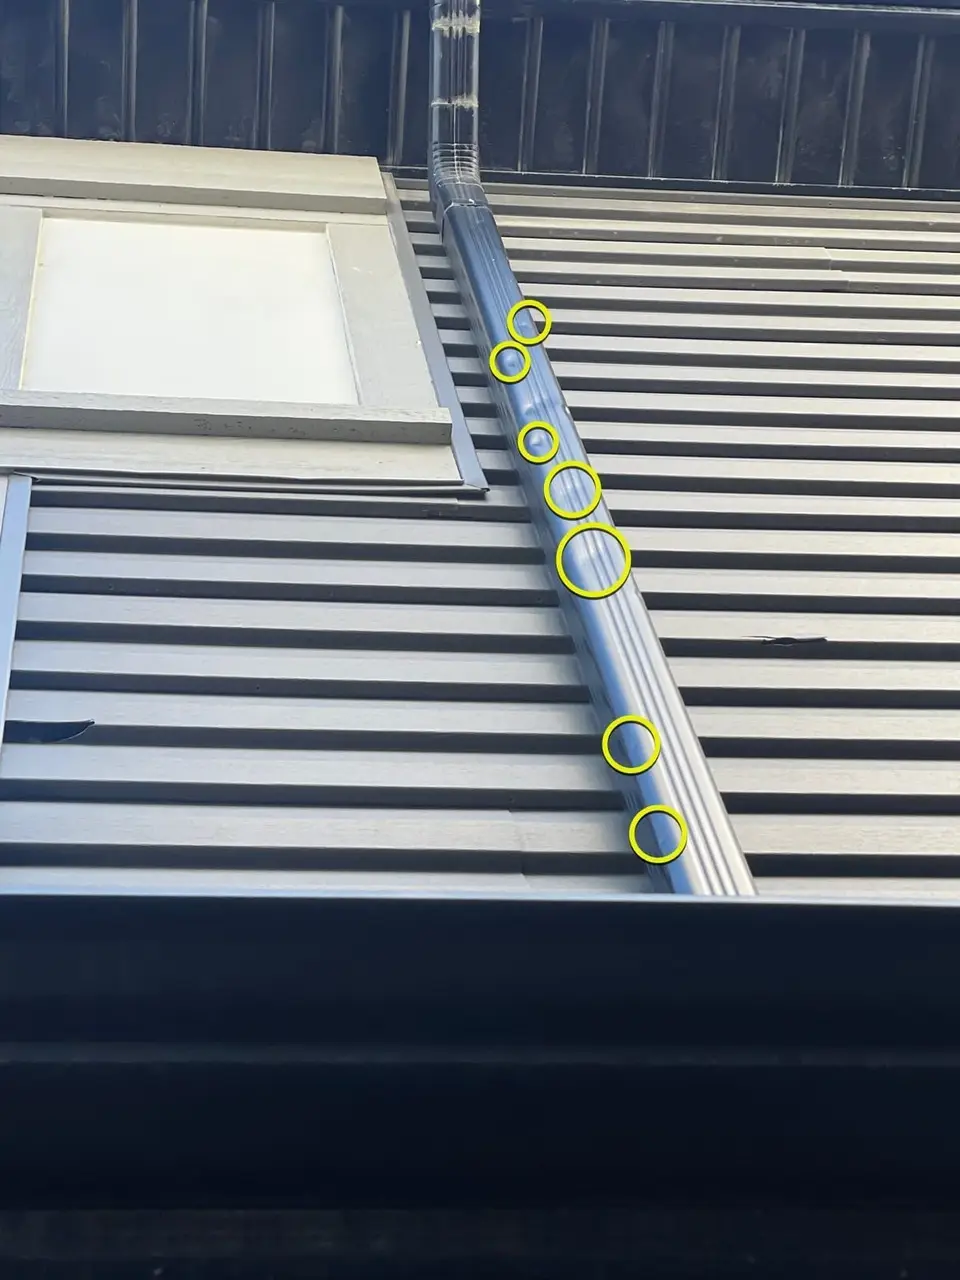
Hail hits to downpipe
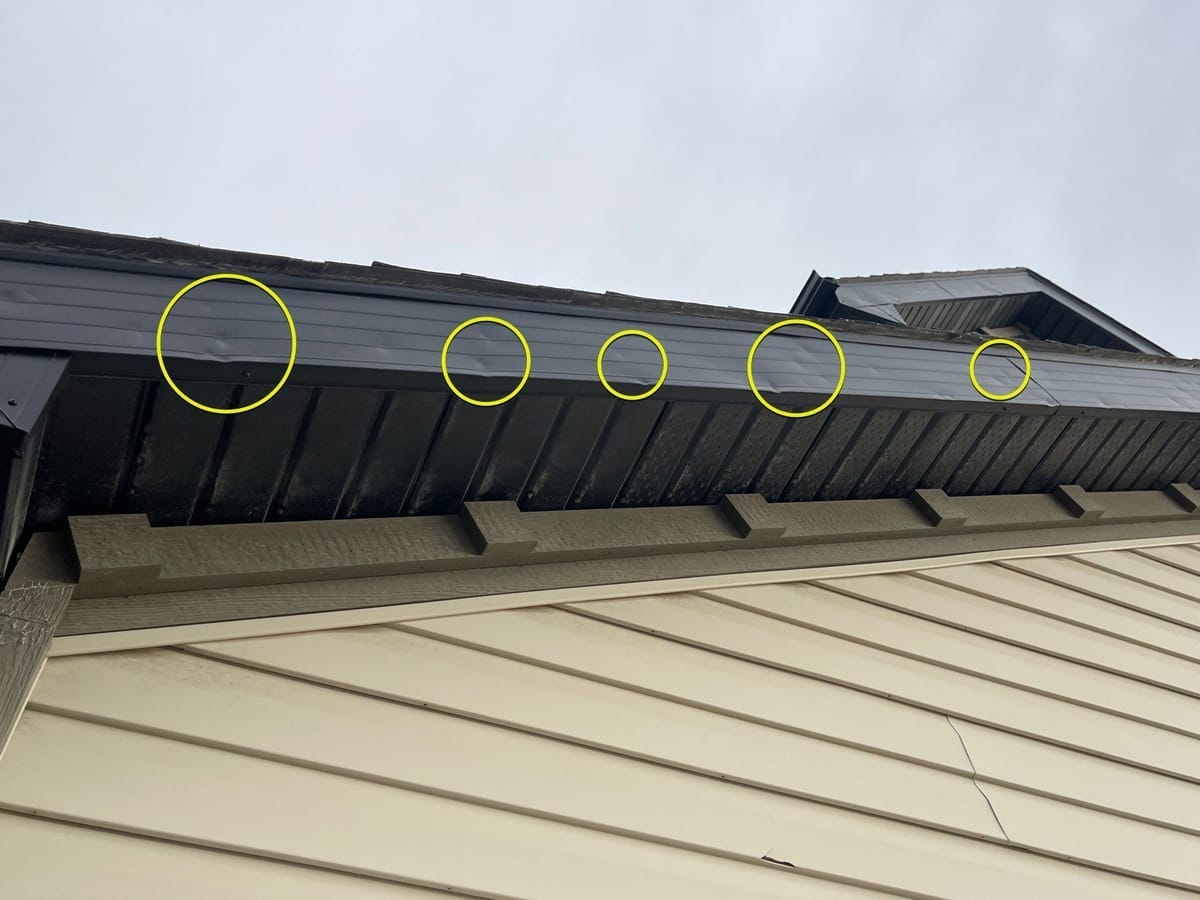
Hail hits to fascia – house front elevation
Soft metals are particularly helpful to speed up your inspection. If you’re assumption is that there’s no damage to an elevation take a pause and take a look at the fascia/eaves or downpipes.. If no damage to them, then you’re assumption is right and that elevation got spared as it (most likely than not) wasn’t facing North-West (the main direction where hail reaches Calgary from).
In most cases, properties with hail damage, there will be a full aluminum eaves and downpipes replacement recommendation to insurance in your Xactimate estimate. Fascia installations and metal drip cap flashing will be limited to only impacted elevations (in Calgary, that’s the north & west facing elevations in 90% of cases).
Inspecting windows & window screens for hail damage
Window screens are another excellent ‘catchers’ of hail impacts. The torn mesh will be obvious reflecting impact hail points. That can equip you right away with early information on whether the elevation you’re looking at is hit by hail or not.
Windows in itself won’t showcase hail damage unless the glazing is broken or there’s holes to the vinyl frame of the window. More often than not, holes in the frame are repairable, depending on their number and if only it doesn’t increase thermal bridging of the building envelope.
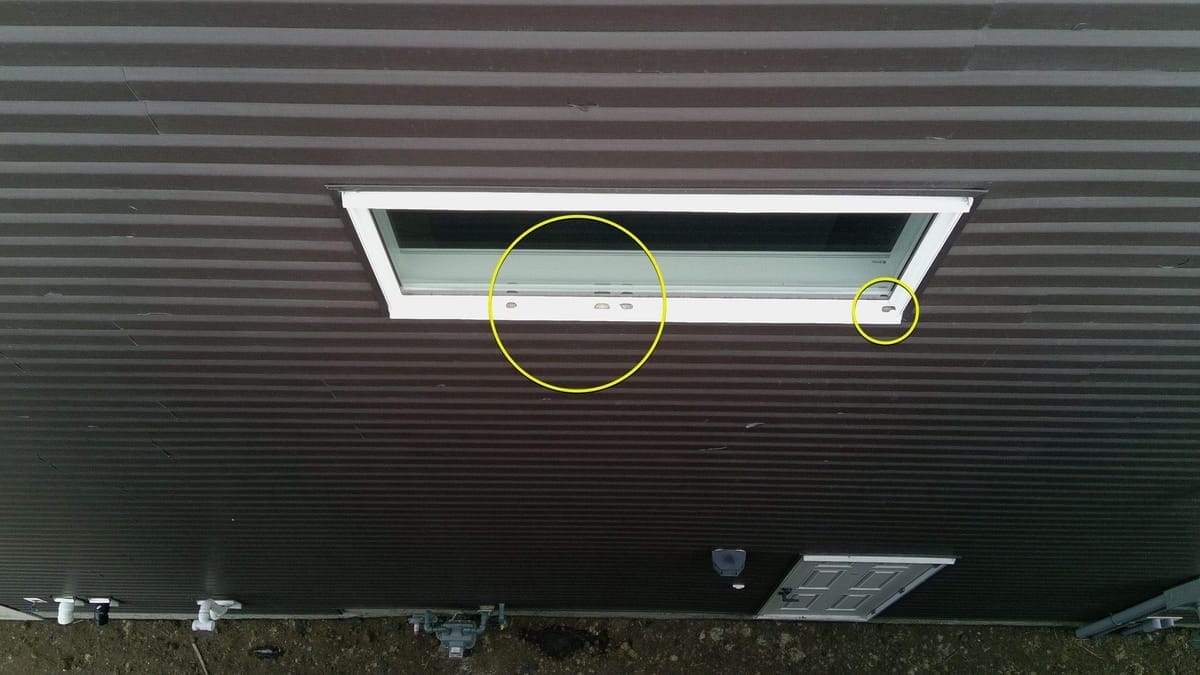
Three holes to window vinyl frame
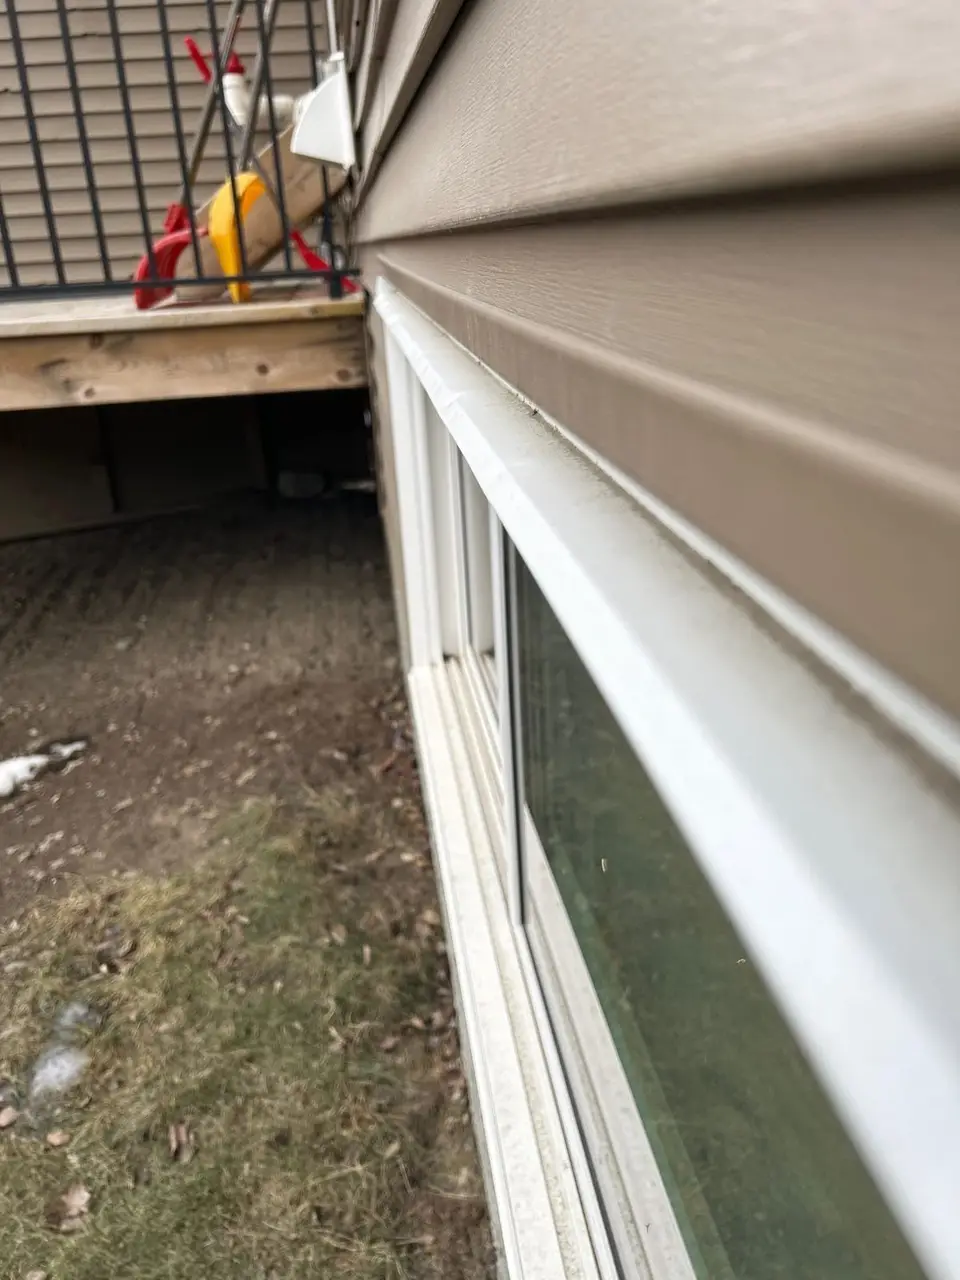
Damage to metal drip cap flashing
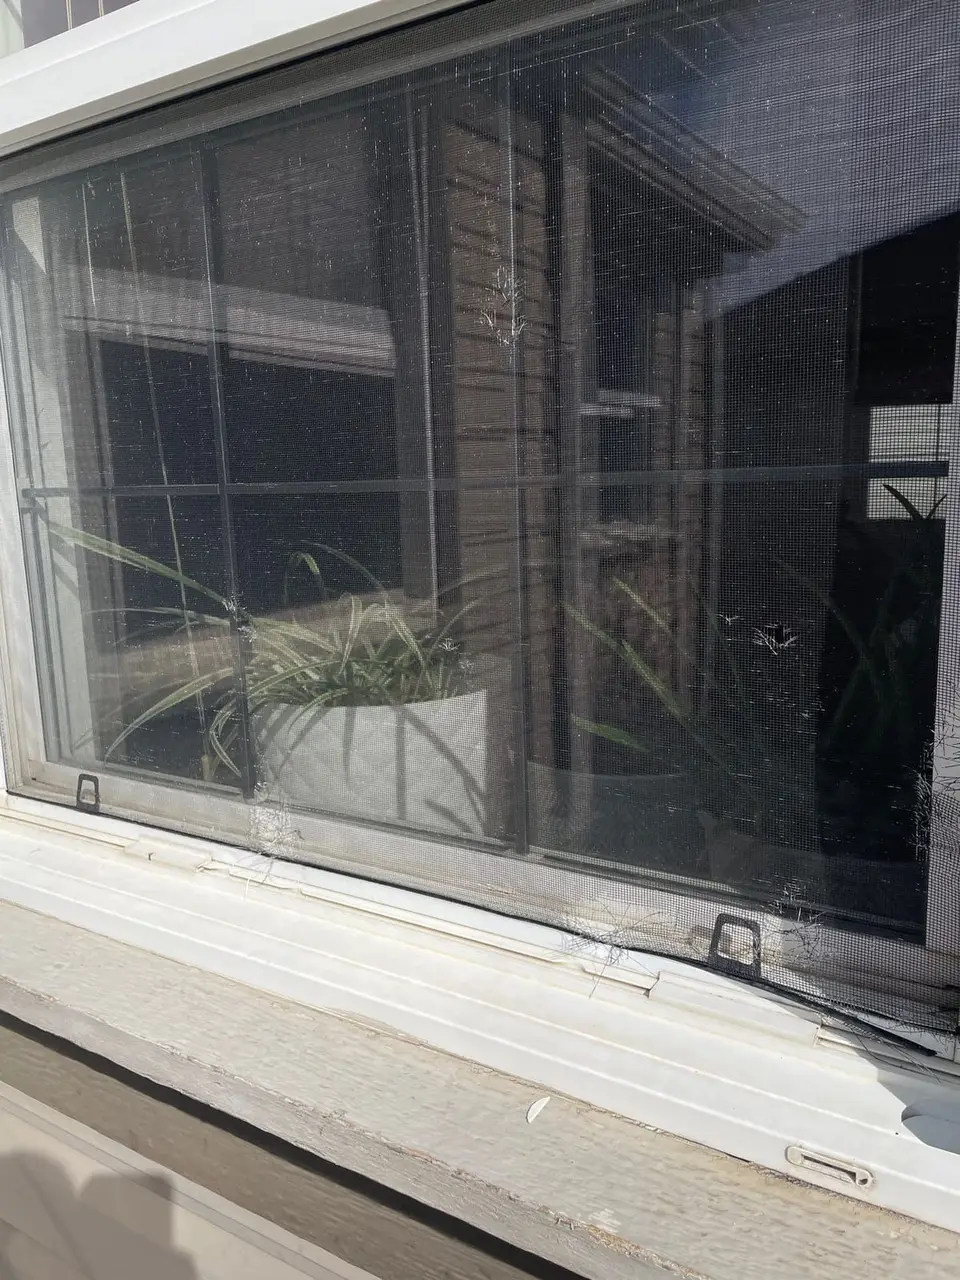
Hail damaged window screen
Windows installations on the 2nd floor occasionally are overlooked for damage as it’s time consuming to setup ladders because of reach. On low pitch sloped roofs, you could simultaneously inspect eaves and windows for damage from above.
You will need the help of a window installer in Calgary to help with damage evaluation. Only then you can either recommend window welding or full window replacement.
Inspecting overhead doors for hail damage
Garage doors consist and easy section of your overall inspection. You will either notice:
- Stains to garage doors that can be pressure washed away
- Marring to paint, which would imply re-painting
- Solid dents to overhead door
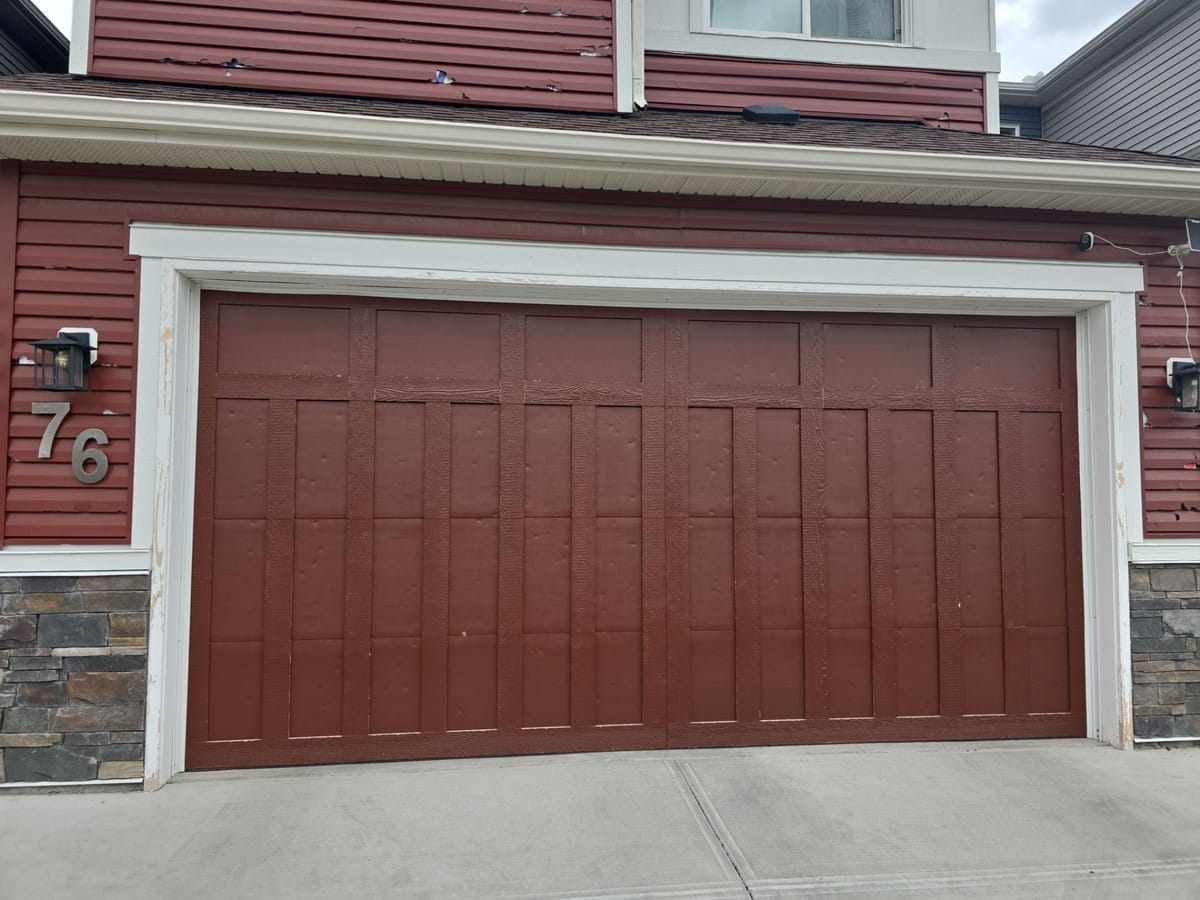
Solid dents to garage door
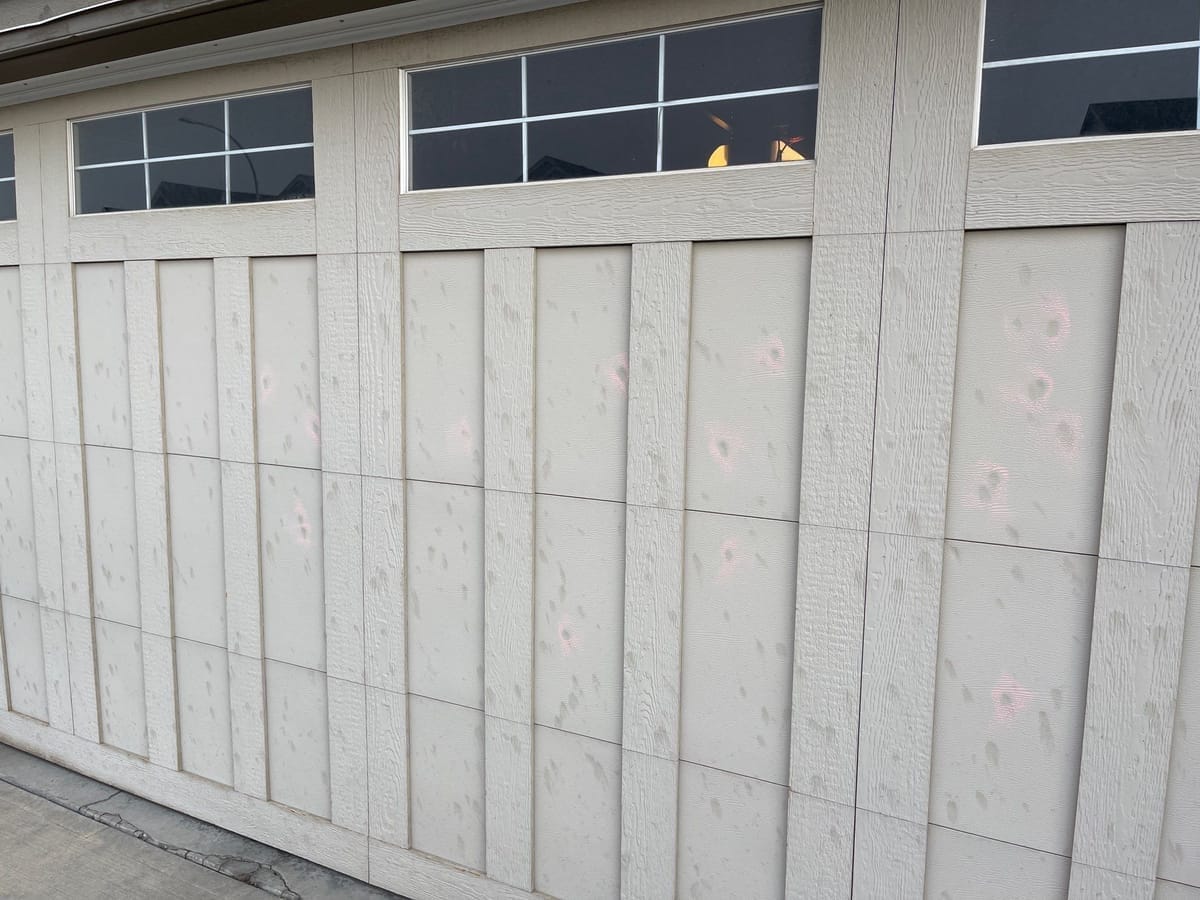
Paint stains to garage door
The tricky part sometimes but not often, is that the garage area is heavily trafficked, so you will see mechanical dents caused by other reasons. Again, patterns, circular dents, and documented dents above the mid-line of the garage door will classify your report as reliable all backed up by photos in your CompanyCam account.
Inspecting damage to fence from hail storms
Detecting hail damage to wooden fence is obvious unless you’re inspecting a weathered wooden fence. Weathered wooden fence will exhibit dark-green nuances similar to a scatter plot.
Now, if hail got a good hit of the fence, as an inspector, you should be able to see chips or marring damage to painted/weathered layer. The hit would compromise this layer, and the structural component of the fence (the wood) would exhibit it’s original yellow layer.
Consequently, a pattern of rough circular hits should be forming a dense scatter plot and that rounds up your report regarding the fence.
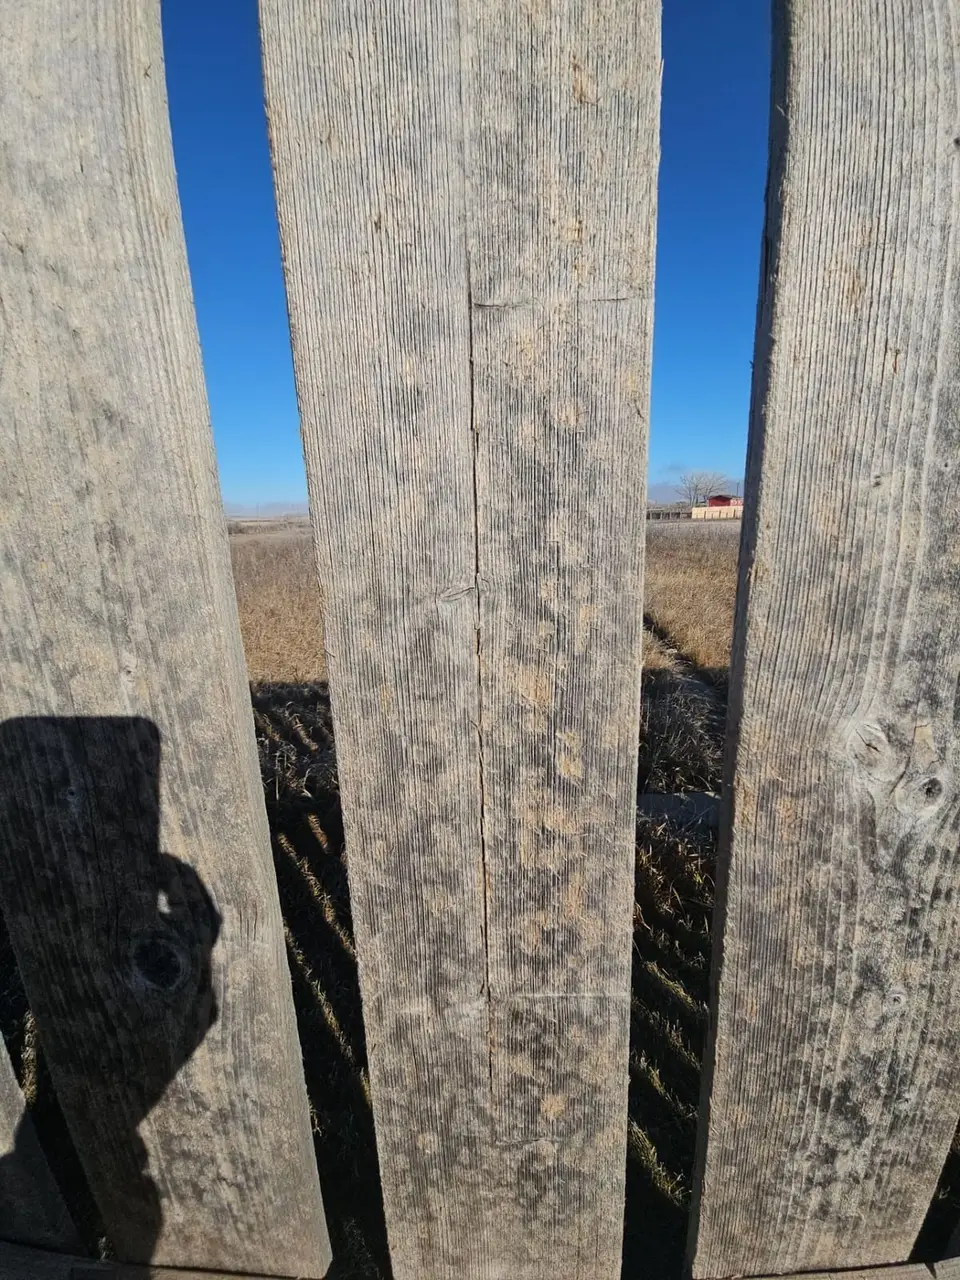
Close up of hail hits to weathered wooden fence
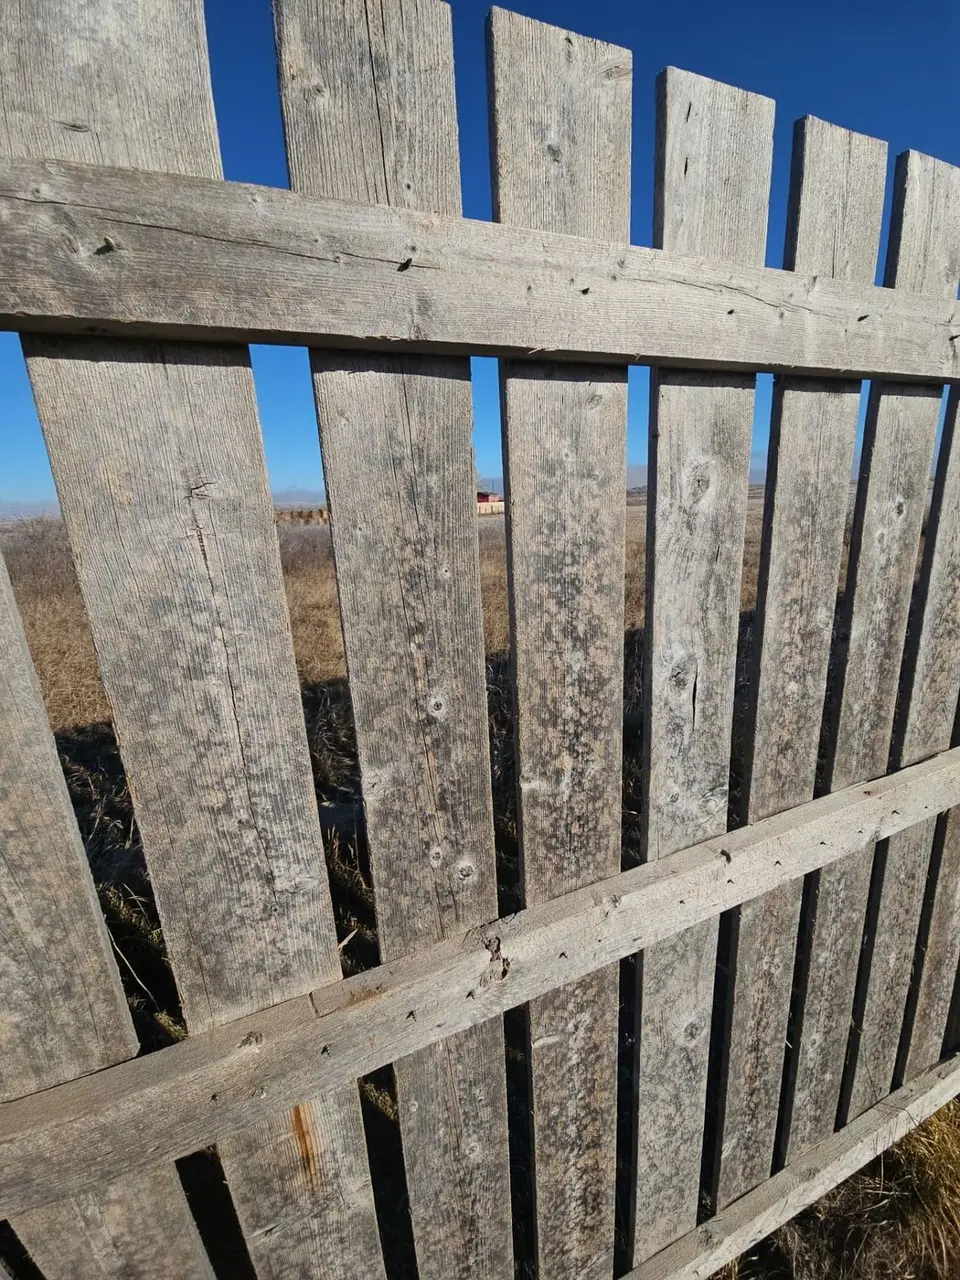
Far up photo of hail damage hits to wooden fence
Preparing hail damage report (back at the office)
You’re back at the your office now what? Restoring a property to it’s former glory start with a report. Fire up CompanyCam and open your projects. These are super easy to find as CompanyCam’s search bar is super efficient with keyword search e.g. type the unit number only of the full address and you’ll find a project instantly.
Use their ‘Reports’ options to spin up a report will all the findings from the field. Attach photos to support your claims. Creating a hail template with commonly used line items will speed up your process by 10X.
Complement your findings with measurements from Hover or Eagleview. The rule is that whenever Hover fails for different reasons, Eagleview with their satellite repository should be able to supply you with exact measurements.
Email the report to the insured and help them with their claim process along the way with their adjuster.
If you’ve missed a section don’t fret. Re-attend the site and take photos directly from CompanyCam so that way they’re saved to your project in the cloud. Update report, attach documented damage and re-send.